
 |
|
|
 |
Target - Grans Tower!
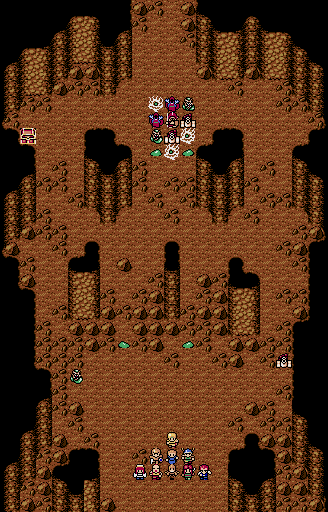
| Battle 7: Cave to Pacalon | |
 |
Party: 


 Monsters: 


 Spoils: 1) Protect Milk |
| This battle is extremely difficult for this point in the game, especially if your characters haven't been appropriately leveled. Choose one side of the path (NOT the center) and go in that direction. The enemies will eventually disband in order to advance on your party, so try to attack them just before they attack you, or else take a single hit before swarming a single enemy unit. The Dark Smokes and Dark Mages can cast strong spells on your party members and can wipe them out in a single turn if they all go at the same time, so be very careful about who you send and where in relation to these magic-users. Additionally, don't forget to pick up the Protect Milk in the corner. | |
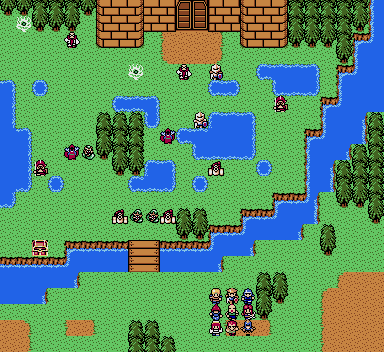
| Battle 8: Pacalon Outskirts | |
 |
Party:
Monsters:


Spoils: 1) Antidote, 2) Antidote, 3) Healing Seed, 4) Healing Seed, 5) Brave Apple |
| Like the previous battle, this one can be extremely difficult if your party members are poorly organized. If while crossing the bridge the Dark Mages attack, a lot of party members could be easily defeated, so be careful and try to lure them across the bridge to swarm them if at all possible. To cross the bridge, the best bet is to defeat one enemy at a time so that a path is made for your characters to surround the rest; remember, though, to always target the magic-using enemies first. The most important of the spoils in this battle can be found to the left just after the bridge, and because of his excellent movement and flying capabilities, Kiddo is the best candidate to obtain the item. After the battle, Julia the Birdwoman and Sylvia the Knight join the force. | |
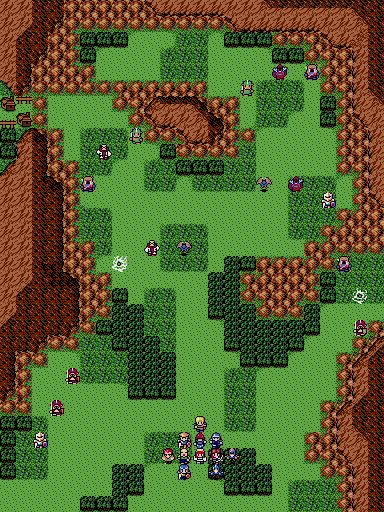
| Battle 9: Moun Outskirts | |
 |
Party:

 Monsters:


Spoils: 1) Antidote, 2) Antidote, 3) Antidote, 4) Healing Seed, 5) Healing Seed |
| The most advantageous characteristic of this particular battlefield is its size; your characters start grouped together and can move as a single unit, but the enemies are spread throughout the entire battlefield, making this battle ideal for any particular training you would like to provide for any weaker characters (such as Julia or Sylvia) on the force. While the enemies won't pose a large threat because of their dispersement, they are still a threat to these weaker characters and should not be taken any less seriously for the potential damage they can cause (such as the Dark Mage or the Dark Smoke). Defeat all of the enemies, gather a few items, then proceed onward. | |
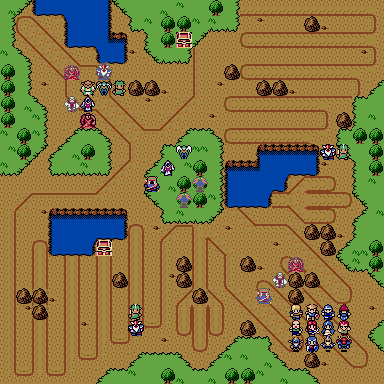
| Battle 10: Moun | |
 |
Party:
Monsters:

Spoils: 1) Robin Arrow, 2) Quick Ring, 3) Steel Sword |
| Unlike the last battle, you're completely surrounded by the enemies, and despite the direction you choose in order to confront them it's going to stay that way. Start by travelling northward towards the treasure chest and take out the two enemies guarding it; pick up the Robin Arrow as your reward. When finished, as a group, travel to the south and then to the west to confront that group of enemies, stronger characters in the front as always. Search the well to obtain the Quick Ring, then make your way towards the southwest. Before finishing the battle, search the other well in the southwest corner to obtain the Steel Sword. The only true danger of this battle will be, again, the Dark Mages, who can cast Blaze 2; take them out first, then the Priests, then anyone else that gets in your way. After the battle, Eric the Dragonman joins. | |
| Battle 11: Nazca Ship | |
 |
Party:
 Monsters:


Spoils: 1) Power Spear, 2) Battle Axe |
| Normally, one would be able to celebrate the elimination of Dark Mages from the battle party, but that would be too hasty; to replace them are Witches, which are very, very similar with exception only to their statistics. These enemies, again, along with Priests, should be your priority in any group of enemies. There are two treasure chests in this battle, so it would be wise to start by trying to reach those first. On the way, you will encounter monsters in significantly large groups, making this battle a little difficult if you have to confront them all at once, but also provides a good opportunity for leveling up; you ususually won't fight more than three or four at a time and can reach them all fairly quickly. Regardless, continue until you find and (hastily) defeat Magus, who poses even less of a threat to your party than the Witches you will have already encountered. Surround him and pummel him until he dies. After the battle, Minto the Wizard joins the force. | |
|
|