Site Navigation

RPGClassics Main
Contact Maintainer

Shrine Navigation
Characters
Game Genie Codes
How to Play
Items
Magic
Monsters
Ranges and Targets
Rings
Shops
Soundtrack
Thanks
Walkthrough
Weapons
Chapter 4: The Great Fortress of Balbazak


Pao
New Force Members: Jogurt, Kokichi, Vankar
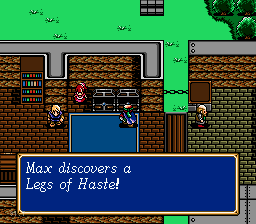
New Items: Long Sword, Legs of Haste, Bread of Life

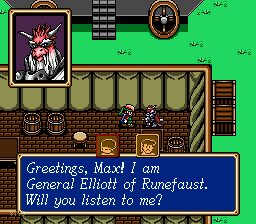
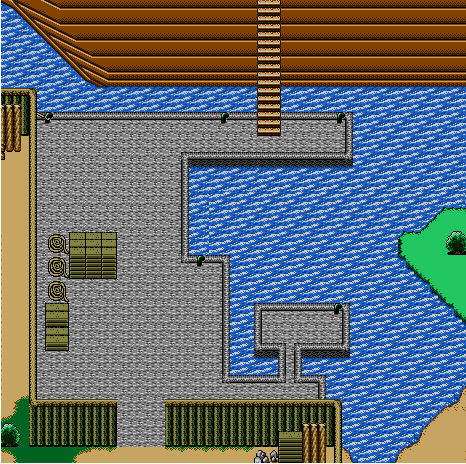
          Upon appearing in Pao, travel south, then east, and enter the bulding next to the man on the blue carpet who sells items. Talk to the person in the top-right corner of the shop and agree to listen to his story. He'll then leave and you are free to explore the town.
          In the building just to the right, you can find a Long Sword in the treasure chest. In the wagon just to the north, open the chest on the right side to obtain the Legs of Haste, then inside of the wagon to the far left is a chest containing the Bread of Life. This place is also a Weapons shop, so buy some things if necessary. To get Jogurt, return to the chapel in the northwest of the area, then search the bed next to the Priest. He'll join after a short scene. When ready, return to the cart on the far right and talk to the girl with the red hair twice. You'll leave, so will the wagons, then Kokichi will fly in and join you. Afterwards, travel slightly northwest and talk to Vankar; he'll join as well. Once finished, exit to the east for Battle 12.

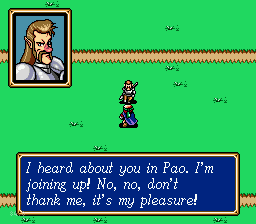
Battle 12: Pao Prairie
Battle Party:Max Tao Lowe Luke Kokichi Hans Gong Mae Zylo Khris Balbaroy Amon
Enemy Party:Pegasus Knight Pegasus Knight Pegasus Knight Pegasus Knight Silver Knight Silver Knight Silver Knight Silver Knight Dark Priest Dark Priest Dark Priest Lizardman Lizardman Lizardman Lizardman Lizardman Artillery Elliot
Conditions for Winning: Defeat Elliot
         In the beginning of the battle, all but about 6 of the enemies will move forward and the rest will stay behind to protect Elliot. Wait until the enemies get distant enough from Elliot to begin approaching so that you don't have to fight everything at once. Once you get close enough, either attack or be attacked. There will be a lot of enemies to face, so concentrate on one at a time and keep your healers and ranged fighters from being hit. Oddly, the Dark Priests won't approach with the rest of the enemies at first, so keep attacking and they should all fall rather quickly without doing much damage to the force. Once ready, heal up, approach and destroy the Dark Priests, then proceed towards the rest of the enemies surrounding Elliot. The Silver Knights are suprisingly easy as long as they're not healed by the Dark Priests, but watch out for Elliot's attacks. Luke or Gort should be able to survive them most effectively, but will still need healing afterwards. Once you're able to, surround Elliot and leave room for healers and mages to support the onslaught against him.
Pao Revisited
New Force Members: Domingo, Guntz
New Items: Elven Arrow, Steel Sword

          After the battle, Pao will appear once more just to the southeast, so enter. Travel east to the Queen's wagon once more and loot her two treasure chests to find a Steel Sword and an Elven Arrow. From here, travel south and then to the left to enter the Item Shop. Talk to the man in the upper-right corner and agree to let him hatch the Domingo Egg. Once he's finished, Domingo will appear, so talk to "it" and "it" will join the force. Finally, go right and enter the sheep pen to talk to Guntz; he'll join as well. When finished, exit the town to the right, then head directly north to enter the castle of Uranbatol.

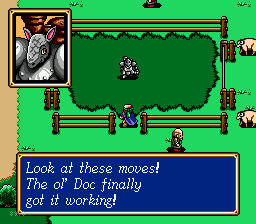
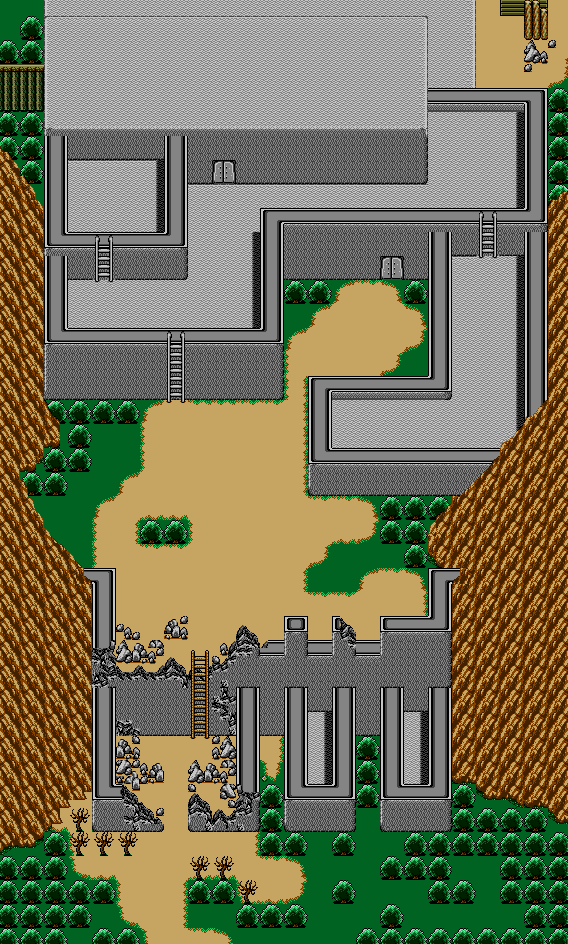
Battle 13: Uranbatol
Battle Party:Max Domingo Lowe Luke Kokichi Hans Gong Mae Zylo Khris Balbaroy Amon
Enemy Party: Dark Priest Dark Priest Dark Priest Silver Knight Silver Knight Silver Knight Silver Knight Silver Knight Silver Knight Pegasus Knight Pegasus Knight Pegasus Knight Hellhound Hellhound
Conditions for Winning: Kill the Hellhound and Artillery blocking the doors
         This battle is rather easy with the party that I have listed as this party will have a definite advantage: flying over the numerous obstacles that would normally block other party members. Even though Domingo is new, he can fly onto terrain far away from any enemies so that he can't be reached to be attacked and cast Freeze on an enemy to cause them serious damage. Before moving anywhere, however, send one of your party members to the right to find the Kenji item in the bushes, if you want. It's useless, but it's available. The Silver Knights in the beginning can be easily conquered this way, but watch for the Hellhound who can cause serious damage to any party members unprepared for his simple attack. Keep your party in large groups throughout the battle to destroy any of the scattered enemies that approach. First, you want to ascend the stairs and kill the Hellhound guarding the first door, then the Artillery, as when you do, you'll be able to access more of Uranbatol first. In the end, however, it really doesn't matter.
Uratanbol
New Force Members: Earnest
New Items: None
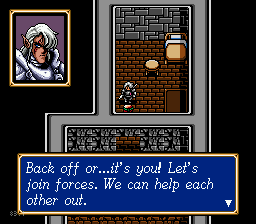
          If you made your way through the upstairs entrance, head down the stairs, up and down more stairs, then left and through the door for a short scene. Afterwards, talk to Earnest and he'll join the force. If you chose the bottom door like I had suggested, you can find Earnest by travelling northwest to the very small building above the shop. Head down the stairs and talk to him.
          In either case, when finished scale the north stairs to enter the small building, then go southeast until you reach a guard. He'll open the door because you're friends of Earnest apparently, so proceed north to the dock to enter Battle 14.

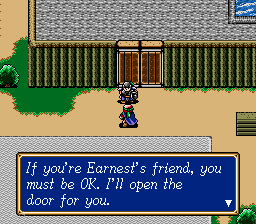
Battle 14: Urantanbol Dock
Battle Party:Max Domingo Lowe Luke Kokichi Hans Gong Mae Zylo Khris Balbaroy Amon
Enemy Party: Dark Priest Silver Knight Silver Knight Hellhound Hellhound SeabatSeabatSeabatSeabatSeabat Artillery Artillery Artillery Balbazak
Conditions for Winning: Defeat Balbazak
         Your party will be attacked from the front and right sides, so arrange your party accordingly. Try to be constantly attacking, concentrating on one unit at a time, and healing anybody up front who takes a few hits from oncoming enemies. The large group that swarms you from the start should fall rather quickly, and the Hellhound and Evil Puppet won't move from Balbazak. In fact, even after that Balbazak won't move, so prepare, and then surround him with everything you've got! His attacks are pretty strong, so don't let any units go unhealed, but overall, he won't present much of a problem.
          Another scene will take place; you must say yes to Balbazak before you can continue. Do so, and the chapter will end.
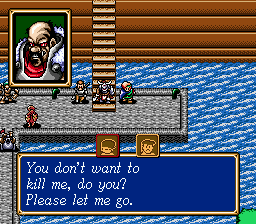
Walkthrough Home

Proceed to Chapter 5: Gateway to the Hidden Shrine


(c)2006 RPGClassics.com. All materials are copyrighted by their respective authors. All games mentioned in this site are copyrighted by their respective producers and publishers. No infringement on any existing copyright is intended. All rights reserved.