
Gemity
If you played Star Ocean 2 (The Second Story), then the idea of a city where all you do is play games will be familiar to you. But instead of a name like "Fun City," Star Ocean 3 (Till The End of Time) has a city in 4D Space called "Gemity." There, you can- Bet on bunnies in the Bunny Races
- Battle your way through the Fighting
Arena
AND - Best your opponents with your brain in Runic Chess
Bunny Races
The Bunny Races have changed a little bit from their previous incarnation in Star Ocean 2 (The Second Story). There is no one to sell you any "tips" on which bunny may or may not win the race, and the bunnies don't have any special stats that you can look at to help figure out which might be the likeliest to win. It's completely random. You can bet on a single bunny to win, or you can bet "perfecta," meaning which two bunnies will get first and second place, in any order. You don't have to wait between the end of one race for the next one to start. Just talk to the Ticket Seller and she'll announce that tickets are on sale for the next race.
For example, if you choose "Bunny #4, to win," then Bunny #4 has to get first place in order for you to get any points from that race. But if you bet "Bunnies #1 and #4" in a perfecta, then either Bunny #1 or Bunny #4 can come in first place. Whichever bunny doesn't come in first place must come in second place in order for you to win. So if you bet Bunnies #1 and #4, but Bunnies #1 and #3 place first and second, respectively, you don't win.
The payout (how many points you get) is based on what "grade" the race is. The grade also affects how much it costs to place a bet (whether it's a single bet or a perfecta bet costs the same, but your payout will be better if you bet perfecta).
| Race Grade | Ticket Cost | Single Win | Perfecta Win |
|---|---|---|---|
| A | 300 Fol | 3 points | 9 points |
| B | 200 Fol | 2 points | 6 points |
| C | 100 Fol | 1 point | 3 points |
The races themselves are generated at random, so there's no way to ONLY enter Grade A races so you can get more points. And you have to sit back and watch the whole race-- there's no way to skip the race scene or anything like that. Each race is different however; besides having a different number and "theme" to go along with the different grades, you'll often see races where the bunnies just run the whole time, and some races where the bunnies try to out-jump one another. When one bunny jumps particularly high, they can cause an earthquake that stumbles their opponents, giving the just-jumped bunny an opportunity to catch up or take a lead. By the way, the "themes" actually have no bearing on the race. The ticket seller might say that the race is between bunnies that all look alike, but it won't be; there are always four different bunnies, and you can always tell them apart.
The bunnies always start the race in a short diagonal line: Bunny #1 is first, #2 is second, and so on. Bunny #1 is always the ordinary, pink-looking one; Bunny #2 is the angry yellow one, Bunny #3 is the happy green one, and Bunny #4 is the sleepy light blue/purple one. But don't let the expressions on their faces fool you! The angry one doesn't always have speed, and the tired one isn't always slow! As before, the races are completely random.
Because there is no way to "beat the system" within the game, the only way to ensure you can get the 100 points necessary to get the Bent Mystic Blade (necessary for recruiting Boyd, one of the best Inventors of weapons in the game) or the 1000 points necessary to get ALL of the prizes is to get a PlayStation 2 Turbo Controller, tape down the X key while you're at the Bunny Race location, and then leave the room for several hours... possibly several days. What this does is consistently bet to win on Bunny #1, regardless of the Race Grade or anything else. If you opt to do this, make sure you have plenty of Fol! It is possible to apply this method without a Turbo Controller, though; you'll just have to sit there and pay attention to the races. I always bet perfecta on Bunnies #1 and #4, and while they don't always win, when they do, it's a very nice payout for me. I went from 0 points to 28 in about a half hour, which is not bad!
When you finally decide you've had enough and you want your prizes, head on over to the Bunnyman at the prize counter. Rather than exchange your points for prizes, you simply are eligible for more prizes the more points you get. That's why it's best to work your way up to 100 or even 1000 points, because you can get all the prizes worth less than that, too! You also don't LOSE points if you get a prize, or if you lose a bet.
| Prize | Price (in points) |
|---|---|
| Commemorative Prize | 1 point |
| Laser Weapon | 10 points |
| Giant King Crab | 50 points |
| Bent Mystic Blade | 100 points |
| Scumbag Slayer | 200 points |
| Bunny Shoes | 350 points |
| Pomello Juice | 500 points |
| Bunny Race Trophy | 1000 points |
It's worth noting that all of the prizes except for the Commemorative Prize, the Bent Mystic Blade, and the Bunny Race Trophy can be acquired through other means, whether by Treasure Chest or by Item Creation. The Commemorative Prize isn't really good for anything, but you need the Bent Mystic Blade to recruit the Inventor Boyd, and the Bunny Race Trophy actually has some good factors which make it a great accessory in many of the Bonus Dungeons!
Good luck!
Fighting Arena
A staple of any good RPG, the fighting arena is where you can choose to battle in Single Battle mode (with just one character) or in Team Battle mode (with a team of three characters), or in Ranking Mode, where your "team," (any combination of your player characters) will battle other teams of monsters until you get to the Reigning Champions. The battles function just like the regular battles, though the enemy HP, MP, and Battle Skills may vary depending on your current level and where you're at in the game. For the Ranking Mode, your opponents also improve their strength and skills over time, just like you do. So the #1 team will actually be a challenge to beat, instead of being a clone of random enemies you may have encountered out on the map! Like the previous game, you can also choose to fight within different ranks to test your strength. You'll level up like you do in regular battle, but if you die, you'll simply lose the tournament, rather than get a Game Over. You will forfeit your entry fee if you lose or escape from the battle.
Fees and Prizes for Single Battle Mode
| Rank | Entry Fee | Prize | Number Allowed |
|---|---|---|---|
| D | 100 Fol | Magical Berries | One per character |
| C | 300 Fol | Mallet Charm | One per character |
| B | 500 Fol | Bunny Shoes | Only one |
| A | 1000 Fol | Star Guard | Only one |
| S | 2000 Fol | Imposing Scroll | Only one |
What the "number allowed" column refers to is the fact that, within the Single Battle Mode, you can enter any single character in the D and C ranks and get the prize. For example, Fayt can enter the D-rank competition, win, and get Magical Berries, then Nel can enter and win that same rank competition, and she will also get Magical Berries. However, if Fayt enters the S-rank competition and wins the prize (the Imposing Scroll), then should Nel enter that same competition and win, she will not get the prize-- basically, the higher up the rank, the less of the prize there is to go around. Once someone wins the high-rank competitions, there's not much of a point in entering other characters, unless you want to just level them up....
D-Rank Competitors
| Match Position | Enemy Name | HP | MP | Skills Used | Status Anomalies | Resistant | Weak |
|---|---|---|---|---|---|---|---|
| 1 | Fire Zombie | 16,200 | 50 | Fire | Paralysis | Fire | Water |
| 2 | Nova Blaze | 15,000 | 60 | Fire | -- | Fire | -- |
| 3 | Magma Man | 34,000 | 22,000 | Fire | Poison | Fire | Water |
| 4 | Stinger | 11,000 | 300 | -- | -- | Fire | Water |
| 5 | Destroyer | 28,000 | 1,600 | -- | -- | Fire | Water |
C-Rank Competitors
| Match Position | Enemy Name | HP | MP | Skills Used | Status Anomalies | Resistant | Weak |
|---|---|---|---|---|---|---|---|
| 1 | Yuan-ti | 45,000 | 1,500 | Water | Freezing | -- | -- |
| 2 | Giant Moth | 25,600 | 2,500 | Wind | Confusion, Silence | Wind | Water |
| 3 | Incapacitator 4 | 17,000 | 2,600 | -- | -- | Fire | Water |
| 4 | Flaming Zombie | 35,000 | 3,500 | Fire | -- | Fire | Water |
| 5 | Blood Monster | 70,000 | 5,000 | -- | -- | Wind | Earth |
B-Rank Competitors
| Match Position | Enemy Name | HP | MP | Skills Used | Status Anomalies | Resistant | Weak |
|---|---|---|---|---|---|---|---|
| 1 | Giant Mantis | 45,000 | 8000 | -- | Paralysis | Wind | Water |
| 2 | Death Master | 45,000 | 8000 | Water, Fire | Freezing | ALL | -- |
| 3 | Gas Dragon Zombie | 82,500 | 8000 | Earth, Fire | Poison | ALL | -- |
| 4 | Proclaimer | 82,500 | 8000 | -- | Instant Death | ALL | -- |
| 5 | Chimera | 200,000 | 28,000 | -- | Paralysis | Fire, Wind | -- |
A-Rank Competitors
| Match Position | Enemy Name | HP | MP | Skills Used | Status Anomalies | Resistant | Weak |
|---|---|---|---|---|---|---|---|
| 1 | Vile Lizard | 76,065 | 3,457 | Water, Fire | Freezing | Water | Wind |
| 2 | Yellow Reaper | 84,000 | 7,000 | Water | Paralysis | Water | Fire |
| 3 | Demon Beast | 160,000 | 7,000 | Fire, Demon | -- | ALL | -- |
| 4 | Dragon Corpse | 240,000 | 7,000 | Earth, Fire | Poison | ALL | -- |
| 5 | Master Demon | 500,000 | 30,000 | Demon | Poison, Paralysis, Instant Death | ALL | -- |
S-Rank Competitors
| Match Position | Enemy Name | HP | MP | Skills Used | Status Anomalies | Resistant | Weak |
|---|---|---|---|---|---|---|---|
| 1 | Nova Blaze | 85,000 | 1,800 | Fire | -- | Fire | -- |
| 2 | Masque Looter | 79,365 | 3,607 | -- | -- | -- | -- |
| 3 | Sharow | 82,000 | 5,000 | Wind | Poison | Earth | Wind |
| 4 | Huge Chimera | 182,900 | 3,645 | -- | Paralysis | ALL | -- |
| 5 | Render Tyrant | 500,000 | 13,728 | Water | Freezing | Water | Fire |
Fees and Prizes for the Team Battle Mode
| Rank | Entry Fee | Prize | Number Allowed |
|---|---|---|---|
| D | 100 Fol | Synthesis Materials | Up to 6 |
| C | 300 Fol | Tri-Emblum | Up to 6 |
| B | 500 Fol | Scumbag Slayer | Only one |
| A | 1000 Fol | Star Splash | Only one |
| S | 2000 Fol | Ring of Slaughter | Only one |
Again, "Number Allowed" refers to how many of that item you can obtain before there are no more available. You can enter a team of any combination of characters up to six times and get Synthesis Materials for winning the D-Rank Competition (e.g. Fayt, Nel, and Cliff one time, Fayt, Albel, and Adray a second time, Nel, Sophia, and Maria a third time, and so on), but after you've entered a brand-new team a seventh time in a D or C-rank competition, you will not get the prize. For the B, A, and S-Rank Competitions, only the first team that wins will get that prize, even if you subsequently enter again (with a new team or with the same team) and win.
For the charts that follow, if any monster has x# next to its name,
that means that more than one of that enemy type appears in battle.
However, the HP and MP stats refer to a single enemy, not the HP and MP
of the enemies combined. However, if there is more than one enemy type,
then the HP of a single enemy of that type will appear on each
respective line.
D-Rank Competitors
| Match Position | Enemy Name | HP | MP | Skills Used | Status Anomalies | Resistant | Weak |
|---|---|---|---|---|---|---|---|
| 1 | Fire Zombie x2 | 16,200 | 50 | Fire | Paralysis | Fire | Water |
| 2 | Ghostly
Hag Nova Blaze x2 |
13,600 15,000 |
65 60 |
-- Fire |
-- -- |
Fire,
Wind Fire |
Earth -- |
| 3 | Magma Man | 34,000 | 22,000 | Fire | Poison | Fire | Water |
| 4 | Stinger x4 | 11,000 | 300 | -- | -- | Fire | Water |
| 5 | Destroyer x2 | 28,000 | 1,600 | -- | -- | Fire | Water |
C-Rank Competitors
| Match Position | Enemy Name | HP | MP | Skills Used | Status Anomalies | Resistant | Weak |
|---|---|---|---|---|---|---|---|
| 1 | Yuan-ti x2 | 45,000 | 1,500 | Water | Freezing | -- | -- |
| 2 | Giant Moth x3 | 25,600 | 2,500 | Wind | Confusion, Silence | Wind | Water |
| 3 | Incapacitator 4 x3 | 17,000 | 2,600 | -- | -- | Fire | Water |
| 4 | Flaming Zombie x3 | 35,000 | 3,500 | Fire | -- | Fire | Water |
| 5 | Blood Monster | 70,000 | 5,000 | -- | -- | Wind | Earth |
B-Rank Competitors
| Match Position | Enemy Name | HP | MP | Skills Used | Status Anomalies | Resistant | Weak |
|---|---|---|---|---|---|---|---|
| 1 | Giant Mantis x3 | 45,000 | 8,000 | -- | Paralysis | Wind | Water |
| 2 | Aquaregia x3 | 39,000 | 3,000 | Water | Freezing | Water | -- |
| 3 | Gas Dragon Zombie | 82,500 | 8,000 | Earth, Fire | Poison | ALL | -- |
| 4 | Proclaimer | 82,500 | 8,000 | -- | Instant Death | ALL | -- |
| 5 | Chimera | 200,000 | 28,000 | -- | Paralysis | Fire, Wind | -- |
A-Rank Competitors
| Match Position | Enemy Name | HP | MP | Skills Used | Status Anomalies | Resistant | Weak |
|---|---|---|---|---|---|---|---|
| 1 | Vile Lizard x2 | 76,065 | 3,457 | Water, Fire | Freezing | Water | Wind |
| 2 | Yellow Reaper x2 | 84,000 | 7,000 | Water | Paralysis | Water | Fire |
| 3 | Demon Beast | 160,000 | 7,000 | Fire, Demon | -- | ALL | -- |
| 4 | Dragon Corpse | 240,000 | 7,000 | Earth, Fire | Poison | ALL | -- |
| 5 | Master Demon | 500,000 | 30,000 | Demon | Poison, Paralysis, Instant Death | ALL | -- |
S-Rank Competitors
| Match Position | Enemy Name | HP | MP | Skills Used | Status Anomalies | Resistant | Weak |
|---|---|---|---|---|---|---|---|
| 1 | Aqua Wisp x3 | 80,000 | 8,000 | -- | Paralysis, Confusion | ALL | -- |
| 2 | Masque Looter x3 | 79,365 | 3,607 | -- | -- | -- | -- |
| 3 | Sharow Winged Mantis |
82,000 80,190 |
5,000 3,645 |
Wind -- |
Poison Paralysis |
Earth Wind |
Wind Water |
| 4 | Huge Chimera x2 | 182,900 | 3,645 | -- | Paralysis | ALL | -- |
| 5 | Render Tyrant | 500,000 | 13,728 | Water | Freezing | Water | Fire |
Ranking Battle Mode
Ranking Battle Mode is really the best part of the Fighting Arena, and it's great practice to boot! You get the usual EXP and Fol that you do during a normal battle, and every time you beat a team, your position on the ranking chart improves. You start out at position #51 and must work your way to #1. Once you get to #1, the Reigning Champions issue you a challenge, and if you beat them, you get the special Victory Trophy prize! You can challenge any team up to four rungs above you on the chart. Note: if you choose to battle a team that is more than one position above you, you will still only advance one rung up upon defeating them. This means that you may end up fighting some teams more than once in order to get closer to the Reigning Champions!
Of note is the fact that the first time you go to Gemity and sign up for the Fighting Arena, you must choose a team name. Which team name you choose will alter your (Fayt's) Emotional Level with the other characters, so choose wisely! The picking of the team name occurs in PA #52.
For the below chart, as with the Team and Single Battle Mode competitors, if there is more than one enemy that you face in a match, both will be listed. If there are two enemies of the same name, but different types, then any differences in HP, MP, etc. will be listed on a new line, beside the enemy's name. Keep in mind that the HP, MP, and skills apply to a single enemy, not to the enemies as a team or a group of the same type of enemy (e.g. Thieving Scumbag has 200 HP, while Thieving Scumbags x3 have 600 HP total, 200 between each of them).
| Starting Rank | Team Name | Enemy Name | HP | MP | Skills Used | Status Anomalies | Resistant | Weak | Prize Money (in Fol) |
|---|---|---|---|---|---|---|---|---|---|
| 50 | The Bandits | Thieving Scumbag x3 | 200 | 9 | -- | -- | -- | -- | 50 |
| 49 | AAAAAAAA | Thieving
Scumbag x3 Hyper Nobleman |
200 2,640 |
9 120 |
-- -- |
-- | -- | -- | 60 |
| 48 | Ghost Hunters | Ghostly Hag x3 | 13,600 | 65 | -- | -- | Fire, Wind | Earth | 70 |
| 47 | Beowulf | Kobold x3 | 3,400 | 168 | -- | -- | -- | -- | 80 |
| 46 | Secure Or Not? | Security Soldier x3 | 16,000 | 2000 | -- | -- | -- | Water | 90 |
| 45 | Twin Beast | Demonic Hound x2 | 12,000 | 350 | Fire, Demon | Poison | Fire | -- | 100 |
| 44 | Frog Warriors | Spawn Toad Beast Toadpole |
6,160 704 8,500 |
280 32 280 |
-- Water -- |
-- Poison Poison |
Water Water Water |
Fire Fire Fire |
120 |
| 43 | Berserkers | Berserker x3 | 12,800 | 300 | -- | -- | Fire | -- | 150 |
| 42 | Tiamat | Yuan-ti Lizard Man x2 |
45,000 2,000 |
1,500 116 |
Water Water, Fire |
Freezing Freezing |
-- Water |
-- Wind |
180 |
| 41 | Arch-Summoners | Devil
Child x3 L15 Mage |
16,000 4,488 |
2,000 820 |
-- Wind |
-- -- |
Fire ALL |
-- -- |
200 |
| 40 | Get 'Em Twin Beast | Medusa Beast x2 | 80,000 | 20,000 | Fire, Demon | Poison | Fire | -- | 250 |
| 39 | Knights of Babylon | Bogle
Soldier (A) Bogle Soldier (B) |
20,000 | 2,600 | Fire | -- | Water | Wind | 275 |
| 38 | Angels of Flame | Robin Wind x2 | |||||||
| 37 | Soldiers of Mu | Aquaregia Toad Fighter Toadpole |
|||||||
| 36 | Three Warriors of Flame | L80 Fighter x3 | |||||||
| 35 | Bloody Stream | L25 Fighter x4 | |||||||
| 34 | Eurus of the East Wind | Ghostly Hag x2 | |||||||
| 33 | Notus of the South Wind | War Vulture x2 | |||||||
| 32 | Boreas of the North Wind | Ghostly Hag x2 | |||||||
| 31 | Zephyrus of the West Wind | Lility x2 | |||||||
| 30 | Don't Lose! Twin Beast | Cerberus x2 | |||||||
| 29 | Knight Roseria | Cleaver Knight | |||||||
| 28 | Player Killers | Fighter Ridiculer Robin Wind |
|||||||
| 27 | Wild Blood | Berserker
King Brutish Beast x3 |
|||||||
| 26 | Imperial Guard | Lum Knight x3 | |||||||
| 25 | Gigantomakia | Golem SUS303 x2 | |||||||
| 24 | The Three Gurus | Adept Necromancer x3 | |||||||
| 23 | Silent Hammer | Scarlet
Armor Bogle Leader x3 |
|||||||
| 22 | Double Edge | Yuan-ti x4 | |||||||
| 21 | Spirit Mediums | L55 Mage Robin Wind |
|||||||
| 20 | Go! Go! Twin Beast | Bogle Leader x2 | |||||||
| 19 | Daddy's Little Rich Boys | Unholy Terror x2 | |||||||
| 18 | Dragon Eyes | Forager x4 | |||||||
| 17 | Red Ram | Dragoon Knight x3 | |||||||
| 16 | Magic Users | Swordsman
x2 Halberdier x2 |
|||||||
| 15 | Undead Masters | Unholy
Terror Dragon Tooth x3 |
|||||||
| 14 | Insect Lords | Zebra
Wasp x6 Master Ridiculer |
|||||||
| 13 | Intangible Truth | Blue Golem x2 | |||||||
| 12 | Armored Knights | Flying Dark Armor | |||||||
| 11 | Chukober | Immortal
Lord Heat Haze |
|||||||
| 10 | Twin Beast Yahoo! | Monstrous Beast x2 | |||||||
| 9 | We'll Show You | Mecha Scrumbag x2 | |||||||
| 8 | White Lilly Battlefield | Heat Haze x3 | |||||||
| 7 | Bourgeoise | Super
Nobleman Dragoon Knight x3 |
|||||||
| 6 | Sherwood | Scarlet
Knight x3 Robin Wind |
|||||||
| 5 | Knights of the Bloody Sword | Bloody Knight x5 | |||||||
| 4 | Tornado | Tornado Bogle Soldier (H) Bogle Leader (H) |
|||||||
| 3 | Knights of the Sacred Beast | Lum Knight x3 | |||||||
| 2 | Demon Lords | Demon
Lord Miriam |
|||||||
| 1 | Dragoon Knights | Crystal
Dragon Dragoon |
|||||||
| Reigning Champions | Reigning Champions | Solon
Solute Dirna Hamilton |
Runic Chess
Runic Chess is a simplified, automated version of chess that features only three pieces. However, there is some strategy involved in deciding which pieces to place where on your board, because each one has its own strengths and weaknesses. The pieces and their strengths and weaknesses are as follows:| Chess Piece | Strong Vs. | Weak Vs. | Movement Order (Speed) |
|---|---|---|---|
| Thief | Symbologist | Warrior | 1 |
| Symbologist | Warrior | Thief | 2 |
| Warrior | Thief | Symbologist | 3 |
Your pieces will always be white, while your opponent's pieces will
always be black. Thieves have a bow and arrow; Warriors have a shield
and sword, and Symbologists have a pointy hat and a round-tipped rod.
Note that the pieces don't ALWAYS look the same, and your Warriors will
differ from your opponent's warriors in ways beyond color. Pay close
attention to the pieces once your opponent places them so you know what
you're up against!
Your opponent will place his pieces first, and then
you can decide where to place yours. Once you confirm the placement of
your pieces, the game begins and you can't make any changes. The pieces
(both white and black) will move according to their presets (for
example, your opponent's Thieves will always move first, then you can
move your Thieves). Pieces can only move forward one space at a time, in a straight line! Whoever destroys all their opponent's pieces wins the match. Note: all of your opponent's pieces must be destroyed before you can win!
The same applies to your opponent. If either you or your opponent
cannot move, the match is declared a draw. You can only choose from the
three types (Warrior, Thief, Symbologist), and you can only choose
however many there are "player" slots on your field. For example, if
you're playing Level Four, you can only pick two pieces. They can each
be the same kind, or two different kinds. You
and your opponent will always have equal numbers of pieces before a
match.
You can determine where best to place your pieces by finding out which
of the following preset "maps" your opponent places his pieces on,
according to the Level you are playing. The map will stay the same for
a given level, but the pieces your opponent places vary. For example,
if you're playing Level Four, and your opponent places a Thief in
Position 1 on his side of the field, and a Warrior in Position 2 on his
side of the field, you can look at the map and know that the pieces are
going to move one square ahead (or to the side) in each turn. Knowing
at what point both your opponent's pieces and your own will "meet," you
can figure out what pieces to best place in Position 1 and Position 2
on YOUR side of the field so you win! Note: Position 1, 2, etc. are the
order in which the pieces appear on the board. So your opponent's
"Position #1" piece is the piece that first appears on the board. Your
Position #1 is the first piece that YOU place on the board-- the first
square that is highlighted once it is your turn to place pieces.
Once the game begins, the pieces will move on their own. If you have a Thief, you will start. If the Thief cannot move, turn will shift to your Symbologist or Warrior, whichever you do have. If you have both, the Symbologist will move first, followed by the Warrior. Once all of your pieces have moved one space (unless a piece is blocked by another of your pieces, or by a "drop zone," where no piece can move), your opponent's pieces will move. When one of your pieces meets an opponent's (or vice versa), a battle begins. The stronger piece will win, while the weaker piece will be destroyed. If the piece initiating the attack is weaker, then the receiving piece will have an Anti-Attack Aura and will counter-attack and destroy the opposing piece.
Level Maps and Strategies
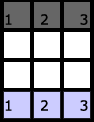
For all of the following maps and strategies, your opponents pieces are in the dark gray squares, while your pieces are in the light blue squares. For the strategy grids, keep in mind that each column alternates between you and your opponent, so that the first column is the first piece your enemy places, while the second column is the first piece that YOU should place (to counter his first piece).- Level One
- Level Two
- Level Three
- Level Four
- Level Five
- Level Six
- Level Seven
- Level Eight
- Level Nine
- Level Ten
- Level S
Level One
Entrance Fee: 200 Fol
Prize: Blueberries
| Enemy Position #1 | Your Position #1 | Enemy Position #2 | Your Position #2 | Enemy Position #3 | Your Position #3 |
|---|---|---|---|---|---|
| Thief | Warrior | Symbologist | Thief | Warrior | Symbologist |
| Thief | Warrior | Warrior | Symbologist | Symbologist | Thief |
| Symbologist | Thief | Thief | Warrior | Warrior | Symbologist |
| Symbologist | Thief | Warrior | Symbologist | Thief | Warrior |
| Warrior | Symbologist | Thief | Warrior | Symbologist | Thief |
| Warrior | Symbologist | Symbologist | Thief | Thief | Warrior |
Level Two
Entrance Fee: 400 Fol
Prize: Blackberries
Level Three
Entrance Fee: 600 FolPrize: 1100 Fol
Level Four
Entrance Fee: 800 FolPrize: Synthesis Materials
Level Five
Entrance Fee: 1000 FolPrize: Ripe Berries
Level Six
Entrance Fee: 1200 FolPrize: 5000 Fol
Level Seven
Entrance Fee: 1400 FolPrize: Strength Berries
Level Eight
Entrance Fee: 1600 FolPrize: Perfect Berries
Level Nine
Entrance Fee: 1800 FolPrize: 50,000 Fol
Level Ten
It's a bit odd to pay more money for a prize you can get in Level Four, but if you're up for a challenge, play this level. If you're only after Synthesis Materials, then play Level Four instead.
Entrance Fee: 2000 FolPrize: Synthesis Materials
Level S
Entrance Fee: 2200 FolPrize: Lezard Flask
 The text in this document is licensed under the Creative Commons Attribution-NonCommercial-ShareAlike License. Anyone is free to use, copy, modify and re-distribute this work as long as they agree to the terms in the license.