
 |
|
|
Skellys and Bats and Goo, Oh My!
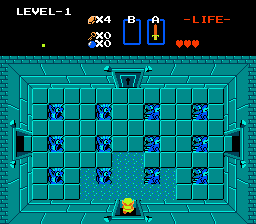 |
Here we are, Dungeon 1, "The Eagle." When you enter you'll notice that there is a locked door in front of you and two open doors on the right and left. Now any green-clothed spelunker _knows_ you always want to go through the locked door eventually, right? Go to the right one screen and clear out the 'Stalfos' there (from now on referred to as "Skellys"). You will be rewarded with a key after prying it from their cold, dead fingers. Go back to the room you came from. |
| Time to go through the locked door now right? Wrong! Go to the screen on your Left, there are 3 bats in there. After killing them a key will somehow drop from the sky, giving you a total of two. Now go back one screen and head Upwards through the locked door. | 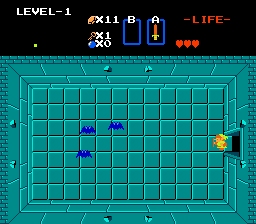 |
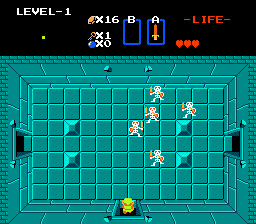 |
Clear out the 3 skellys in the next room and go Up to the next screen. Kill these five, and you are rewarded with another key. It's a good thing Ganon designed every dungeon in the game with the exact same lock design! Sheesh, if you're going to imprison a beautiful princess and try to befoul an entire realm with evil, at least be a bit creative with your dungeon layout! That is like, soooo 1986. After getting the key go Right one screen. |
| Now go bat-whacking once again. After hacking through those winged rats you can get yourself the compass, which will show you where the Triforce is located via a blinking dot. Ew, this thing is coated in guano...go back one screen. | 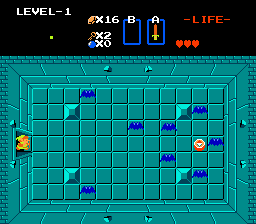 |
 |
Go Left now that you've come back from getting the compass. More bats in the belfry! The door behind you slammed shut too, if you didn't notice. Killing the bats will reopen it however so don't worry. Either kill all the enemies or skip them and just open the locked door and head Up one screen. |
| What are those three drops of goo guarding, a shut door? But, if you kill them, you'll notice that it doesn't open up, there must be another way of doing it. After removing any hostiles, walk up to the single block and give it a good shove. It will unlock the door on the Left. Enter it. | 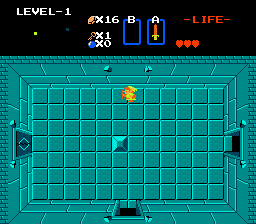 |
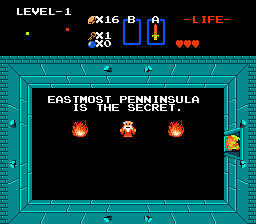 |
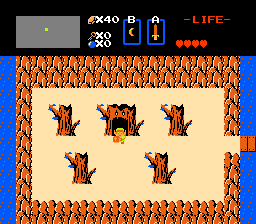
Ah yes, it's the old man who gave us our weapon of bat/skelly/goo-slaying +4! At least it looks like the same guy. Anyways, after listening/reading his cryptic comment go back the way you came, and just ignore his shouting that you give him his sword back. Old men know how to take care of themselves against legions of the undead. |
| Go Right. More gooies are everywhere! As you summarily lacerate them you'll notice something at the bottom of the screen. Go stomp over it to acquire the item. It's a map, it shows you the dungeon's layout. Now the blinking dot makes more sense. Unlock the door on the Right and enter it. |  |
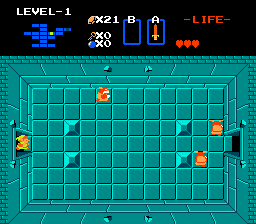 |
Now we're being beset by boomerang-tossing Goriyas (or as I refer to them, "boomerang guys"). Be careful! They are the first moderately-difficult enemy in the game. Beat them by blocking their boomerangs when they fire 'em near you with your shield, and by shooting them with your sword from a safe distance. After vanquishing them you win the Boomerang, a really useful item you can use with the B button. It can kill the weaker enemies (like the gels and the bats) and stun many other types of stronger enemies, allowing you to hit them when they are still. Now go back one screen and head Up one screen, there's another treasure to get. |
| Kill the three skellys there and get the key they drop (the same design again! Ahh!). Use it to unlock the door Above you. Next kill the three boomerang guys and they too will drop a key. Use it to go Left. | 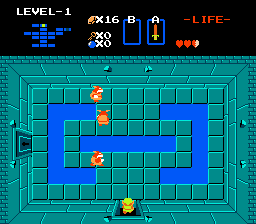 |
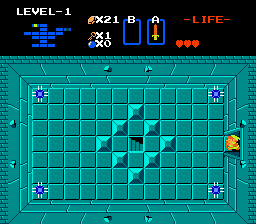 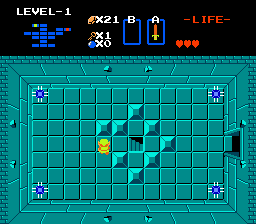
| Now don't move. You're in a room with a trap, when you enter the Line of Sight of those spikey blue boxes they will smash together. When you are ready, run straight across to avoid the first clash. Then, when the blocks have stopped moving, edge a little towards the bottom of the screen, then quickly dart back. The blue spike-blocks should rush forward and bounce off each other. As they go back to their original position, maneuver yourself around the bottom of the screen so that you end up on the left side of the diamond-of-blocks. Push the farthest left block either up or down, it should move. Enter the stairs. |
| After entering the stairs, kill the four bats and go ahead and claim the object at the top of the opposite staircase. It's a bow. Once we buy some arrows you can shoot them at enemies. Remember that every dungeon has one of these secret rooms and you usually need to go here to progress to the next dungeon, if there are exceptions to that rule I'll let you know. Now exit the stairs and go back the way you came (Right one screen and Down two). |  |
 |
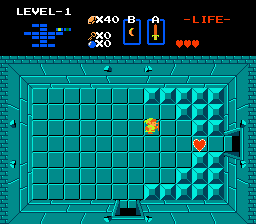
We're almost done. Before continuing go backwards through the dungeon and fill up your health if you are missing any hearts. You'll want to fight the boss at full strength. Go Right one screen (it's the room where you got the boomerang). Avoid the enemies unless you want to risk the heart loss and go Right again. The last key in Dungeon 1 is at the end of this screen, but be careful when walking along the walls, giant hands will emerge and try to grab you. They are slow and easy, so just butcher them for rupies by shooting them with your sword, using your boomerange to stun them if you need to. Ready? Get the key and go Up one screen to the Boss room. |
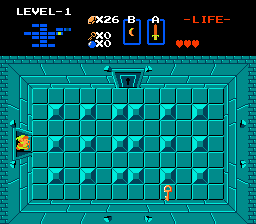
| Here we are in the boss' room, that green unicorn/dragon thing blocking the door and shooting stuff at you. The first thing you want to do is position yourself on the third panel down and second from the left in the room (see the picture for an example). This way most of the guy's shots will go right past you, and make the rest easy to dodge. Now that we are positioned, start shooting the dragon full of beam-fire. You need to hit him six times to defeat him. If you get hit by a fire orb, then get up right next to him and finish the job. Don't worry about losing too much life, you'll get it all back if you survive. | 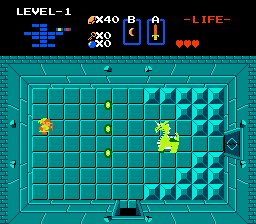 |
 |
Darhar! We have slayed the uni-dragon! Go run over that big heart, you should then notice how your life bar has been extended by one full heart, blessed be the heart containers. Go right one room to claim your prize. |
| For all that work and bloodshed you get rewarded with...a Trivial Pursuit piece!---I mean, part of the Triforce. One down 7 to go. | 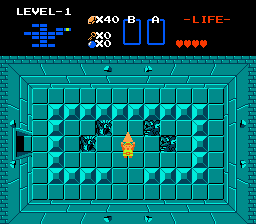 |
 |
After picking up your Triforce piece and lofting it over your head you get warped back out to the entrance of the Dungeon. But, before we tackle level 2, let's upgrade ourselves a bit ,shall we? |