Secrets
The Secrets of Light Crusader
Getting the Sextant |
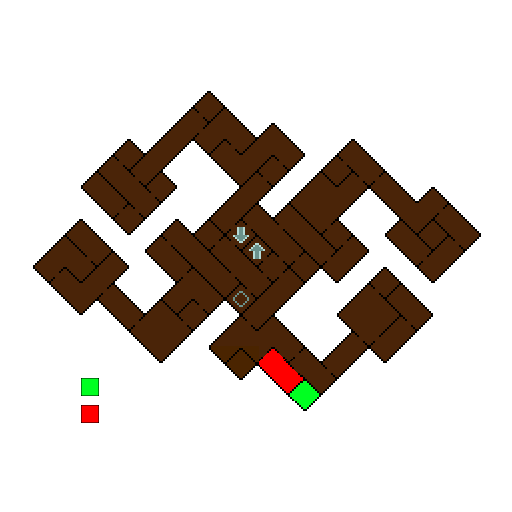
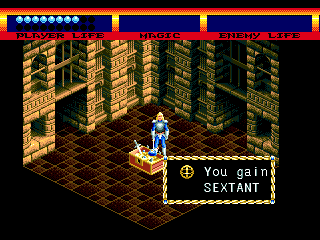
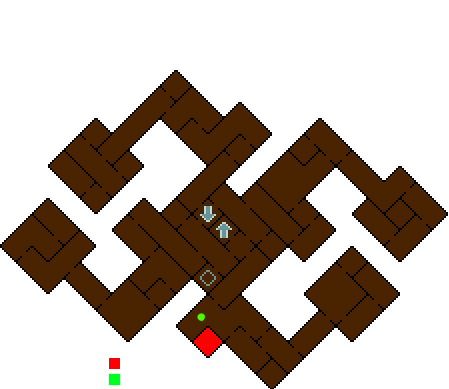
The Sextant is an item that when used lets you teleport to any floor you have already found the Teleport Room for. It is very handy for Fast Travelling between floors. To find it, you must first venture to Floor 2, to a very specific room where you find a scroll next to a skeleton. Here is a map of Floor 2, with the room you need to go to highlighted in Red, and the Sextant room highlighted in Green.
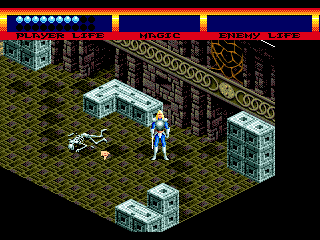
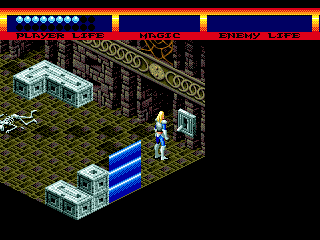
Once you've reached this room highlighted red on the map, attack the stone pillars with your sword. You will find that some of them shatter away, revealing a hidden switch. Flip the switch and go inside the revealed room. Inside you will find the sextant.
|
|
Free Green Potion |
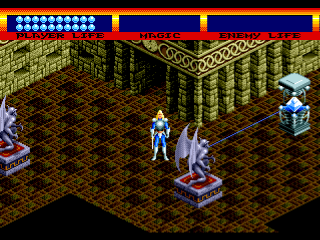
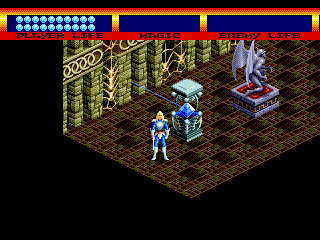
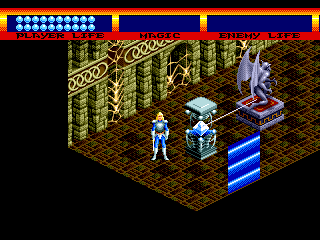
The Green Potion, when consumed, grants you 99 of every element. You can find one as early as Floor 2 in a secret room. The room you need to go to is nearby the room mentioned in the Sextant secret. It's the room where there are gargoyle statues, and a laser pillar. Normally, you would use the laser pillar to open the blocked doorway and then continue on... but if you instead shoot a particular gargoyle with the laser pillar, a secret doorway will be revealed. Inside this revealed room is your free Green Potion.
|
|
Test Mode |
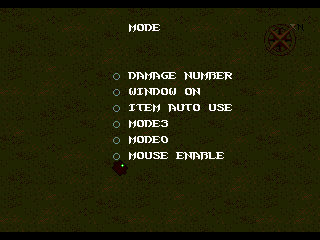
To activate Test mode, pause the game and go to Mode. Deselect any selected options. Now press DOWN 8 times. The music will change and 3 more options will be added to the menu - MODE3, MODE0, and MOUSE ENABLE.
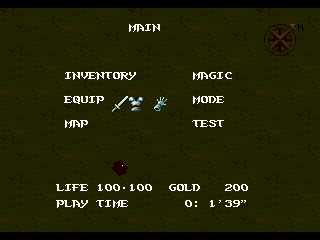
It's unclear what MODE3 and MODE0 do, and MOUSE ENABLE probably only worked when the developers were debugging the game, so these are all pretty worthless now. Back out of the Mode Menu back to the Main Menu. Now you will see that TEST is now available.
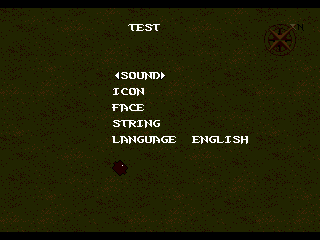
Inside Test are the following features:
-
Sound
- This menu allows you to play every sound or song in the game. Every single song. Every single sound. The sounds can be broken up into 3 categories: Sound (mostly voice), Music, Sound (mostly effects).
-
Icon
- Shows every icon used in the game.
-
Face
- Shows every face used by dialogue in the game.
-
String
- Shows system strings like "Yes", "No", "You can hold no more." etc. etc.
-
Language
- Allows you to select the language for the game.
|
|
Test2 Mode |
To activate Test2 Mode, you must first activate Test Mode, so if you haven't done that, please see the directions for that. Once Test Mode is activated, go into the Test Menu.
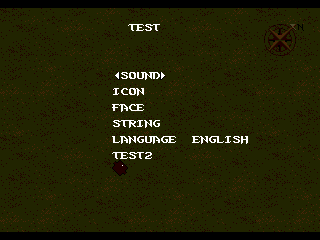
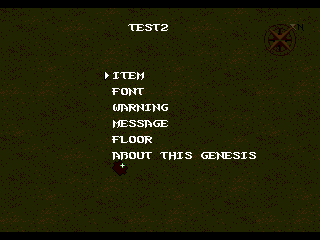
Now press Up, A, Right, A, Left, A, Down, A. You will hear a Cow Moo sound and TEST2 will appear on the menu.
Inside Test2 are the following features:
-
Item
- Shows every item in the game, including items you can never find in game.
-
Font
- Shows a sprite sheet containing the font for the game, but it also has a lot of other jumbled messes in it. If you really want the font for Light Crusader and you have the patience, you could extract it this way.
-
Warning
- Shows a couple of system warnings that are really just publisher/developer information.
-
Message
- Contains every single piece of dialogue in the game.
-
Floor
- Lists every floor/room in the game, and allows you to teleport to those rooms - including rooms you normally can't find in the game. Also strange developer rooms.
-
About This Genesis
- Displays information about the Sega Genesis currently playing the game.
|
|
Debug Mode |
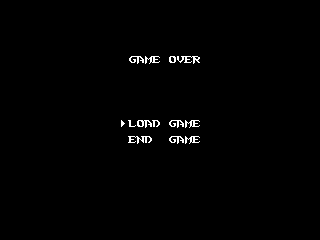
To activate Debug Mode, you must first activate Test2 Mode, so if you haven't activated Test2, please see the directions for that. Once you have activated Test2 Mode, get yourself killed and get a Game Over.
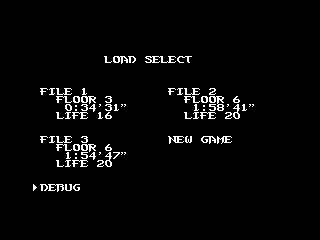
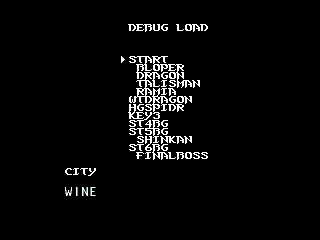
Once you've gotten a Game Over, go to Load Game, down at the bottom, underneath the 4 Save Files, you should see Debug. Go into the Debug Menu and you will see the following features:
-
START
- BLOPER
- DRAGON
- TALISMAN
- RAMIA
- WTDRAGON
- HGSPIDR
- KEY3
- ST4BG
- ST5BG
- ST6BG
These are custom starting points the developers made, I guess for quick debugging. Choosing any of these will start you at a certain point during the game's storyline, with proper equipment and gear for playing that part of the game.
|
|
 The text in this document is licensed under the Creative Commons Attribution-NonCommercial-ShareAlike License. Anyone is free to use, copy, modify and re-distribute this work as long as they agree to the terms in the license.
 The text in this document is licensed under the Creative Commons Attribution-NonCommercial-ShareAlike License. Anyone is free to use, copy, modify and re-distribute this work as long as they agree to the terms in the license.


