Walkthrough Part 2
Level 1: Tail Cave
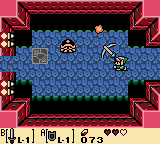 As you enter the dungeon, you'll see two doorways leading north and west, respectively. Start by going west. Two Hardhat Beetles will rush at you. Hitting them with your sword won't inflict any damage, but it will bounce them away from you. Try to bounce them off the edge of the platform into the pit. The shield works too, but not as well, since it causes Link to bounce back a little too. Here Link has just sent one Beetle spiraling into the abyss, and the other is soon to follow. Once you've dispatched the baddies, grab the key that falls from the ceiling and head west into the next room.
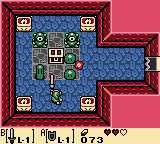 Oh no! As soon as Link sets foot inside the next room, the door shuts behind him! Step a little closer to the treasure chest and a bunch of Gels pop out of the ground, and the floor torches start spitting fireballs at you! Play it cool, though. Just start swinging your sword at anything that moves. You can even destroy the fireballs with your sword! As soon as the Gels are dispatched, the fireballs stop and the exit door opens up. Claim your prize, a brand new shiny Compass! Go back to the entrance room now.
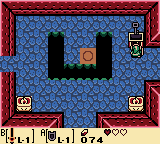 Now head north from the entrance. If you're playing with the sound off, turn it back on. Leave it on. Link doesn't want to adventure in silence, no, he wants to jam to those classic tunes. Besides, if you have the sound off, you won't hear the musical clue that sounds when you enter this room. The compass creates a tone that means there's a key hidden somewhere. Where could it be? Start by killing the enemies in the room. Nope, that didn't work. Well, how about that funny switch in the middle of the room? Aha! When Link steps on it, a chest appears, and inside is the elusive key.
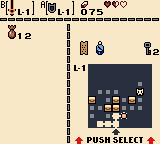 Go east into the next room. By now, this whole "killing all the bad guys in a room" thing should start becoming second-nature for you, if it hasn't already. Now put your skills to the test and kill all the enemies in here. Your reward is a map of the dungeon. Press Start now to see it. Dark rooms are unexplored, light rooms have already been visited. The flashing dot represents your current position. Rooms with little chest-symbols on them have unopened chests. The skull in the upper right is the boss of the dungeon.
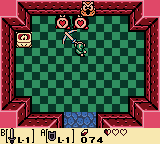 Walk north through the special one-way door. Kill the baddies if you like, then head east through the locked door, using one of your keys. Head north and you'll enter a weird checkered room with a 3-of-a-kind. When you hit one, it freezes on whatever suit it's showing. In order to kill them, you need to stop them all on the same suit. The timing can be tricky if you go after them seperately, so what I like to do is wait until they bunch up close to each other, then hit them all at once with a spin attack. Once they're defeated, you'll win a treasure chest with a stone beak inside. Without it, the inscription on the owl statue is unreadable. With the beak, you can read it: "Turn aside the spiked ones with a shield."
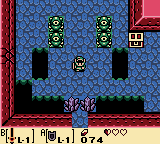 Return south, and go west two screens. Avoid the Sparks and open the chest to obtain another key. Go west again. Kill the little Moldorm scurrying around to get a chest with 20 rupees in it. See the crack in the west wall? Make a mental note of it, we'll be returning here with some bombs later on.
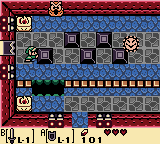 Head north, but watch out for the Trap in the next room. It'll try to sweep across the floor as soon as you get in its line of sight. It's easy to trick, though. Just get close enough to trigger it, then run across its path while it's slowly moving back into place. Go through the locked door (2 of 3 keys used so far). You want to get through the west door, but that stupid hole's in the way! Oh well, just go east (avoiding the Sparks) and work your way back west, only you'll be on the north side of the pit, on the same side as the door. The door's closed now, but opening it is easy. See the block that's not connected to the others? Push it in any direction, and the door will open. Go on through.
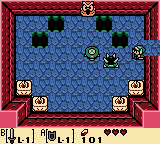 These spikey dudes are the very "spiked ones" mentioned in the owl statue's inscription. There's even another statue here to read in case you forgot the hint. Just follow the advice you've been given. Hold out your shield, let the Spikes run into you, and they will get flipped over, making them easy sword fodder. Head down the stairs that open up.
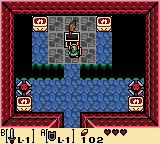 Cool, it's a side scroller, complete with Goombas! You can kill them if you want with your sword, or you can just "hop" across the platforms to the other side. On the next screen, fall down the hole and climb up the ladder. Now you're back to a top-down view. Go north two screens, and you'll see a chest. Proceed with caution past the two Traps, then open the chest to get the Roc's Feather.
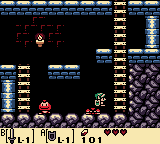 The Feather is one cool item. Equip it right now. Now you don't need to worry about slipping by the Traps when they retract — just jump right over their path of movement. Head south now. If you're low on health, one jump is all it takes to nab the flying heart. Go south once more and go back down the stairs. We're gonna have some fun with the Goombas. Still got that Feather equipped? Good. Now make like Mario and stomp that baddie. Stomping Goombas is great... not only do they make that cute crushing sound, they are also guaranteed to give you a heart when you kill them that way.
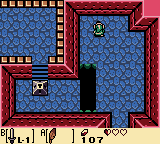 After going back east through the Goomba-filled basement, climb the ladder and take the east exit out of the Spike room. Remember that annoying pit? You don't have to wind around it like before, just jump over it. Now go south two screens, and east once to the room with the Sparks. Head east, but take the northern fork. Follow the narrow passage to the north doorway. In that room, hop over the gap in the floor and walk up to that funny block. Looks just like a keyhole... push on it, and you'll find that's exactly what it is. The block vanishes and you've used all your keys.
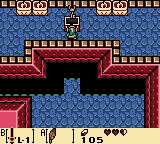 Head up the little stairs that the key block was obstructing, then west, and open the treasure chest there to get the Nightmare Key.
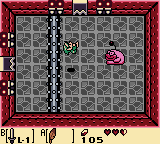 Go east, south, and west back to the room with the Sparks. Now go east but take the southern route this time, and head east once more. There's a door on the east side of this room which is cut off from the rest of the room by a gap in the floor. No problem, just leap across it with the Feather. Enter that door, and you'll come face to face with your first mini-boss, Rolling Bones. He'll push his spiked log toward you, trying to crush you, then he'll leap back over to the other side of the room and try the same thing all over again. All you need to do is jump over the spiked log when it's coming at you, then start hitting Rolling Bones while he's leaping across the room. He'll go down in no time.
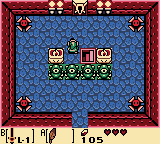 Like all mini-bosses, Rolling Bones will leave behind a teleporter and one or two faeries. The teleporter is a two-way shortcut between the mini-boss room and the dungeon entrance. However, there's no reason to go back to the entrance now, so just go north through the now-open door. There's more Traps in this room, but avoiding them is really easy with the Feather. The stairway leads to a dead-end pit with some skeletons hanging in it, so just ignore it. Instead, use your Nightmare Key to unlock the north door and enter it.
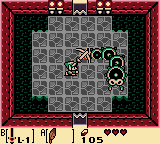 Say hello to the first boss, Moldorm. He's not too hard, but I wouldn't call him a pushover. In fact, if anyone's going to be doing the pushing, it's Moldorm. During the fight, he'll try to knock you into the pit surrounding his platform. If you fall in, you'll wind up in the dead-end skeleton pit that I mentioned earlier. Just climb out via the stairs, enter Moldorm's door, and try again. As Moldorm scurries around, try to hit him in the tail. Watch out, he starts moving faster as he takes more damage. To beat him, you must score four (or so) hits on him in rapid succession. It doesn't count if you give him time to recover between hits.
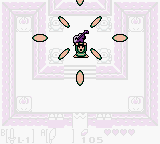 You've done it! The first of the Nightmare bosses has fallen! Once Moldorm stops exploding (you gotta hand it to these bad guys for going the extra mile for their death scenes), a heart container will drop down into the room. Grab it, then head north to collect your prize, the Full Moon Cello. Then listen to that sweet music play, and get a hint about the location of the next dungeon (it's in a swamp).
