|
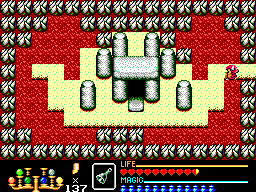
Go to the mountain area at [15,3] and take the upper passage. Go up then right
to reach the village of Eren. Save your game and buy stuff if you need.
To reach the labyrinth, travel north then go left until you find it. Always
use your life saving Ice Bell to do away with the annoying monsters.
|
 |
 |
This is another good place to add some horns to your collection and recover
life and magic, because INNs and magic shops are so expensive. Just enter
and exit the labyrinth, use the Ice Bell to kill the lava flames and pick their
loot. Do it until your life and magic are full, then enter the labyrinth.
|
|
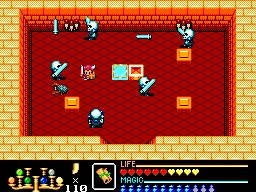
You should still have one key left for the first door, if you don't just buy
one in Eren. In the second room, kill all those crazed bats and get the key before
proceeding.
|
 |
 |
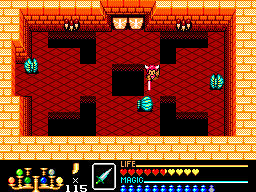
Kill all demons and the shut door will open. Watch out for red one, he shoots
fireballs whenever you're in range. Enter the door and to get through the next room
push the left torch so the door will open.
|
|
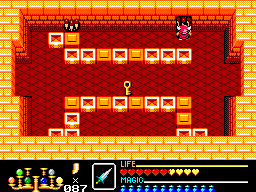
Onto to the next room now, kill all monsters to get another key, then
destroy the brick blocking the right torch on the wall and push it as shown.
So far, so good. Go to next room.
|
 |
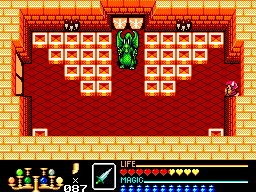 |
You'll be surprised, it's the second boss again! He's back for more and stronger
than ever. Just do the same trick as you did in the 2nd labyrinth and he's history.
You'll get a piece of meat when you finish the dragon and the shut doors will open.
Enter the left door first.
|
|
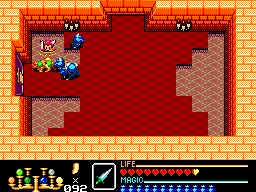
Getting on that warp behind the blocks might be tempting, but don't do it (seriously). You'll
be teleported to the beginning of the labyrinth. Instead go down and kill all monsters.
None of the monsters can shoot so you can safely stay in the water and wait for them to
come to you, it's pretty convinient. Get the key then enter the locked door.
|
 |
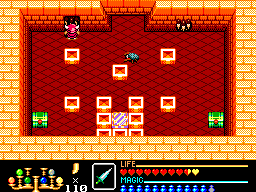 |
Skip the next room, it's best to keep your precious life points safe. When
you go down, kill all bats and ghosts and two bridges will appear but the left door
will remain shut. Go down again, and don't even get close to those chests! They're
monsters! The warp too, it'll teleport you back to the beginning of the labyrinth.
Just push the left torch and quietly go back.
|
|
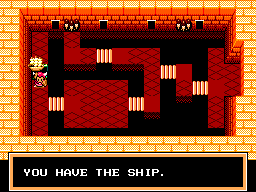
You'll now find the shut door wide open. Enter it and use the Thunder Magic to get
rid of the skeletons if they're out of reach, then get the Ship inside the chest (how did
they fit that in is beyond my knowledge). You'll now be able to cross deep waters such as oceans.
Go back to the dragon room when you're done.
|
 |
 |
Enter the door the dragon was guarding and destroy the top left brick and one of the
blocks will turn into a warp. You can ignore the enemies and enter the locked door to
the right. Don't go left otherwise you'll be trapped until you kill all three shell monsters
and ghosts in the room, and that's one annoying task.
|
|
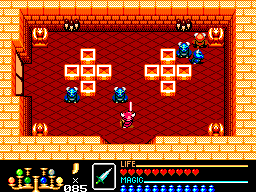
In the next room, unfortunately, you have kill some annoying shells to continue, just
remember you can only hit their front. Once the shut door is open, go up and kill all monsters, which
includes 2 bats and 4 block monsters, so watch out for the latter. The door to the boss will be open,
make sure you have at least half of your life points and some magic.
|
 |
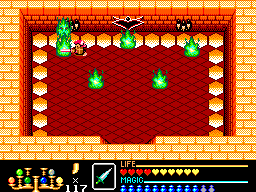 |
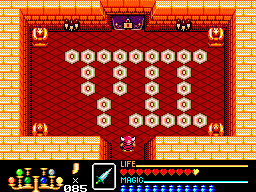
This is most definitely the hardest boss in the game. There are 5 flames, and
one alone among them is the real boss, you must attack each fire individually
until you hit the right one. After you successfully damage him, the fires will
change their formation and you have to do it all over again. That not being enough,
the fires also shoot fireballs at you. Dodging shots can be hard at times because you
also have to worry about the fires around you.
|
|
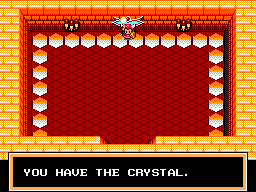
Once you kill the boss, pick the white crystal and leave the place. 3 more to go!
|
 |

