
Bosses
| Chapter 1 |
C-Serpent* |
|||
|---|---|---|---|---|
| Chapter 2 | Octo
the Huge* |
|||
| Chapter 3 | Magma
the Fierce* |
Maxie | ||
| Chapter 6 | Giant Turboss* | Broken Joe* | Hoodoo Doll | Statues of Twin Sumocho |
| Chapter 7 | Silver Jet Pack Jumpers |
Gold Jet Pack Jumper |
Ostroid* | |
| Chapter 8 | Zoda* | Main
Engine* |
Zoda (True Form)* | |
| * - Touching these Bosses
will automatically kill
you, regardless of life amount~ | ||||
| Attack
Power |
How many
Hearts an attack
knocks off per hit. |
|---|---|
| Life Points |
How many
Hearts an enemy has. |
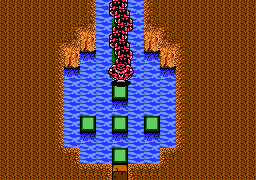
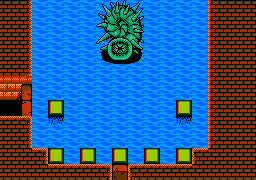
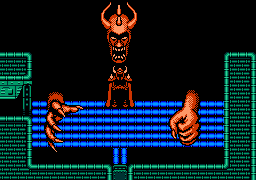
| C-Serpent | |||
|---|---|---|---|
 |
Description |
Attack
Power |
Life Points |
| Swings
back & forth
slightly; periodically spits fireballs at you when mouth is open;
sometimes doesn't shoot them. |
1 | 16 ½ | |
| Strategy |
Attack him when his mouth opens; helps if you have any 'Fire' weapons on you for extra reach. Jump to left or right platform to avoid fireballs he shoots. | ||
| Back to Top | |||
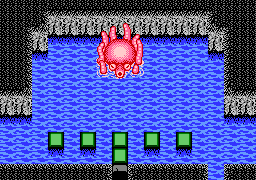
| Octo the Huge | |||
|---|---|---|---|
 |
Description |
Attack Power |
Life Points |
| Moves back
& forth
shooting pellets at you. He will also charge at you. |
1 ½ | 24 ½ | |
| Strategy |
Jump across to one of the platforms to dodge the pellets he shoots at you. When he gets close, hit him with the Yoyo. If you still have the Snowman magic items, time it just right & use them right when he gets near the platforms. If you do it right, you can get off about 15-20 hits before he unfreezes. | ||
| Back to Top | |||
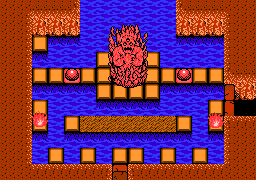
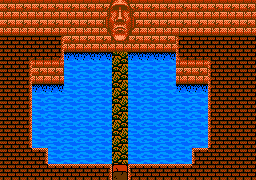
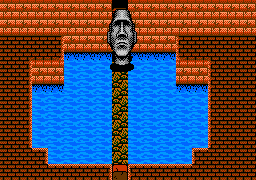
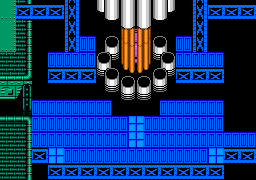
| Magma the Fierce | |||
|---|---|---|---|
 |
Description |
Attack
Power |
Life Points |
| Shoots
fireballs at you in
intervals. Has 2 rotating flames in the room with him. |
Fireballs: 1 Flames: 1 |
N/A |
|
| Strategy |
He cannot die. The only way to defeat him is to drop him into the water. Hit the block in the upper-left hand corner to activate a switch nearby & press it. This will cause the red ball on the left to disappear. Then, step on the block in the bottom-right corner of the square area Magma is standing on (try not to hit him) to activate another switch nearby & hit that one to make the right one disappear. The fireballs & flames will go out & the platform he is on will slowly crumble away until he falls into the water and dies. | ||
| Back to Top | |||
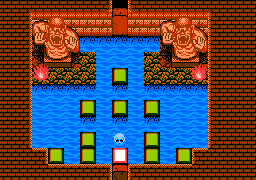
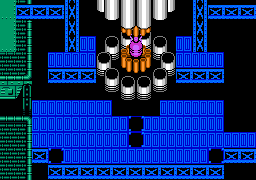
| Maxie | |||
|---|---|---|---|
 |
Description |
Attack
Power |
Life Points |
| *Must
use
Rod of Sight in
order to see it* Moves back & forth at the top of the
screen. Has 4 lava shooters that shoot fireballs at
you.
Maxie can also send minies after you in groups of 2. |
Volcano2: 1 Minie: 1/2 |
9 | |
| Strategy |
Attack it with all the bolas you have, thats the only thing that can reach it. Try to time your hits so you hit Maxie & not the Minies while dodging the fireballs from the lava shooters. | ||
| Back to Top | |||
| Giant Turboss | |||
|---|---|---|---|
 |
Description |
Attack
Power |
Life Points |
| Moves
& attacks pretty
much the same way that Octo the Huge does, but is somewhat stronger
&
faster. |
2 | 17 | |
| Strategy |
The same strategy can be applied for this boss as Octo the Huge, except you don't have Snowmen magic items (that shouldn't really matter anyway). | ||
| Back to Top | |||
| Broken Joe | |||
|---|---|---|---|
  |
Description |
Attack
Power |
Life Points |
| He comes
alive and
starts slowly moving towards you. He will sometimes move back
up. He will open his mouth & shoot stone snakes at
you. |
2 ½ | 7 | |
| Strategy |
You must use the Baseball sub-weapon that you recently picked up. That is the only weapon that can hurt him. Time your shots & jump over the snakes when he opens his mouth & shoot at him. | ||
| Back to Top | |||
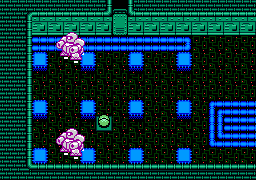
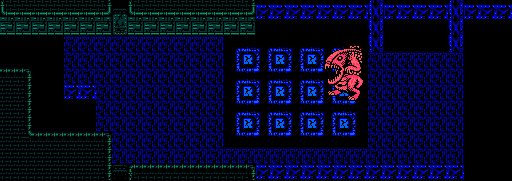
| Hoodoo Doll | |||
|---|---|---|---|
  |
Description |
Attack
Power |
Life Points |
| Walks
around and shoots in 4
directions when you are in its line of sight. First battle is against 1. Second is against 2. |
Touch: 11 Shot: 3 |
14 | |
| Strategy |
If you
have some Asterisk sub-weapons left, now would be a good time to use
them (though, try to save at least 20'ish for later). Try to
catch them off-centered and throw one at them. That way, you
are
not in it's sights & it won't shoot at you, but you can still
hit
it. You can also jump over the bullets that they shoot out. |
||
| Back to Top | |||
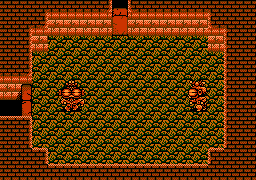
| Statues of Twin Sumocho | |||
|---|---|---|---|
 |
Description |
Attack
Power |
Life Points |
| Both
statues will shoot
fireballs in your direction in groups of 2. They also have
rotating flames on the platforms they are on. |
Statues: 2 Flames: 3 |
10 | |
| Strategy |
By
this time, you should have picked up some more Asterisk sub-weapons on
you. You can try & stand at the bottom in the center
and use
them to hit them both while dodging the fireballs being shot at
you. You can
also try to stand at the top platform & hit go at each one
individually. Just takes some patience with this boss. *Another way to kill them, although it is a little tricky to pull off & not get killed if you don't time it right. Go to where the statues are, get directly in front of them & jump up towards them... yes, you heard me.. jump at them, directly in front of them. Time it right so that you dodge the fireballs they shoot & flames as they pass by. Instead of hitting them, you will jump on top of the platform that they are on & not actually touch them. Being as such, you're too high for the flames to reach you, & the statues' line of sight is too high for their fireballs to hit you (the statue you're on won't even shoot at you, the other one will, but it won't do damage to you even if you jump up directly in its path). So just smack away. When one is killed, do the same for the other statue. Time your jumps, get on, and beat down.* |
||
| Back to Top | |||
| Silver Jet Pack Jumper | |||
|---|---|---|---|
 |
Description |
Attack
Power |
Life Points |
| Bots
fly
around the room
shooting lasers at you. Also has a pod shooter in room that
also
fires lasers. |
Jumpers
(Touch): 2 ½ Jumpers (Laser): 2 Pod Shooter: 1 ½ |
Bots: 12 Pod Shooter: 2 |
|
| Strategy |
Grab the Anklet in the lower part of the platform so you can evade better. Then just jump & evade while shooting at the Bots. Try to take out the pod shooter first, considering its easiest, & there'll be less things shooting at you. Then take out one at a time. Remember, you can turn in mid-jump so you can pivot & shoot in a different direction than you are facing. | ||
| Back to Top | |||
| Gold Jet Pack Jumper | |||
|---|---|---|---|
 |
Description |
Attack
Power |
Life Points |
| Moves
back
& forth
shooting lasers at you. From time to time, will approach you
while
shooting lasers, if you don't keep moving. |
Touch: 5 Bullets: 1 |
32 |
|
| Strategy |
Keeping
jumping around dodging his lasers while pivot-jumping & turning
to
face him & shot him will all the Laser Gun sub-weapons that you
have. He will some times charge you if you stay in place too
long, so try to avoid that. |
||
| Back to Top | |||
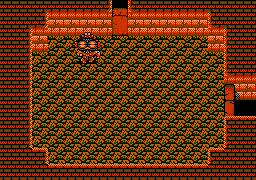
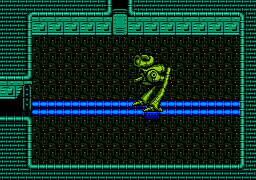
| Ostroid | |||
|---|---|---|---|
 |
Description | Attack Power |
Life Points |
| Fires bullets from its abdomen & purple energy balls from its mouth. Walks back & forth. Sometimes crouches down & leaps forward. | Purple
Shot: 1 Bullet Shot: 2 ½ |
N/A | |
| Strategy | This
boss can't be killed, no matter how many times you shoot it.
You
must knock off of the narrow platform. Start shooting at him
to
knock him backwards & you'll see a switch in the middle of the
floor. Press it. This will activate a switch in
front of
the door. Go back & press it. This will
knock out the
back half of the platform. Now, all you have to do is keep
shooting at him to knock him backwards & he will eventually
fall
off & die (while at the same time dodging his attacks). |
||
| Back to Top | |||
| Zoda | |||
|---|---|---|---|
 |
Description |
Attack
Power |
Life Points |
| A
disembodied head floats
around; hit him & he will shoot his eyeballs at you.
His
claws will sometimes come out and take a swipe at you. |
Eyeball Lasers: 2 Claw Swipe: Insta-Die |
10 |
|
| Strategy | This
battle can be
a real pain, since you only have 3 Hearts. They do have a
Laser
Gun nearby, so grab that first. His head will appear and
start
circling around the room. You want to kill this as fast as
you
can. As soon as you hit him, he will shoot his eyeballs at
you
& then disappear. His head might appear again, if
not, one of
his claws will reach down and make a swipe at you. Just turn
and
run in the direction it's moving towards. After a while, his
head
will reappear so just start shooting him. Rinse &
repeat
basically. Good thing though, is that it only takes 10 hits
with
the Laser Gun to beat him. |
||
| Back to Top | |||
| Main Engine | |||
|---|---|---|---|
  |
Description | Attack Power | Life Points |
| Is the controls for the spaceship. Has 2 pods that release Space Troopers, 2 that release Space Stars & a self-contained blast shield to protect it. | Space
Troopers 3 (Touch): 4 Space Troopers 3 (Laser): 2 Space Star 2: 4 ½ |
Engine 1: 3 Engine 2: 4 Engine 3: 5 Engine 4: 10 Space Troopers 3: 4 Space Star: 2 |
|
| Strategy | A
really hard boss to kill & not BE killed in the
process. 2 upper pods will open up & release Space
Troopers 3
& the lower 2 will shoot Space Star 2 (if you are in their line
of
sight). When the Core's blast shield is down fire away as
many
shots as you can, trying not to hit the Space Troopers in the
process. When the shields come up, the Core will start to
regenerate itself (only slight), & does this EVERY time the
blast
shield closes. All I can tell you is to destroy the troopers
so
they don't get in your way & blast away at the core until it
closes, kill things around you, then blast away again when it opens up. *Life for the Engine is split into 4 parts. When you damage it to a certain point, it becomes noticeable. When you damage it some more, it will be more noticeable. Whenever the blast shields close, it will regen back to the previous level (if you hit it 3 times & it changed; when the doors close & open, you'll have to hit it 3 more times to take it back to where it was). |
||
| Back to Top | |||
| Zoda (True Form) | |
|---|---|
 |
|
| Description | ~The
Last Battle!.... Whoo Hoot!!!~ Jumps from platform to
platform. Fires
shots from his abdomen & spits out Zoda Spawn that will come
after
you. |
| Attack Power | Bullets: 2 Zoda Spawn: 3 |
| Life Points | Zoda: 50 Zoda Spawn: 1 |
| Strategy | The last boss in the game (thank god/goddess/choiceofdeityhere). Not really as much as a pain as the last one you fought, but close enough. He will hop around on platforms while shooting bullets at you. At the same time he releases Zoda Spawns from his mouth that chase after you. You'll have to jump from platform to platform, pivot & shoot whenever you get the chance. Try to keep your distance when you jump & shoot, so you don't accidentally jump onto a platform that he is also on. He has a lot of life, so it'll take a while, but you'll eventually beat him (he'll start spewing up on the floor when he's beaten; just stay back & wait for him to poof). |
| Back to Top | |
 The text in this document is licensed under the Creative Commons Attribution-NonCommercial-ShareAlike License. Anyone is free to use, copy, modify and re-distribute this work as long as they agree to the terms in the license.