
 |
|
|
Allied Actions
Allied Actions (AA) are special attacks that your characters can use,
either in duo/trio groupings, are all together. There are 5
different types of AAs. They are:OFFENSIVE
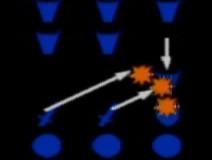
These AA's are specifically designed to cause damage to enemies. Most of these require the dual efforts of either 2 main attackers, or 1 main attacker and 1 assisting his/her attack by casting a spell on their weapon to increase damage. Can be pretty effective when combined with other AA's. Remember, like all attacks, these can miss at times.
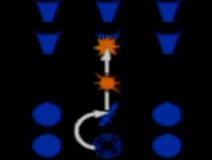
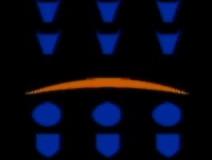
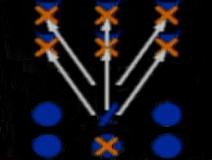
| Converge Attack |
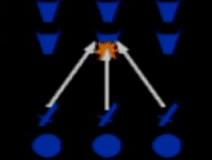 |
Party Rank: 6 | Front Row: 3 |
|---|---|---|---|
| Result: | Large damage inflicted on 1 enemy. | ||
| Automatically learned when you reach Rank 6. | |||
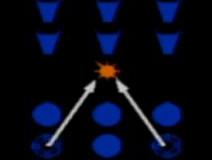
| Sweep Attack |
 |
Party Rank: 5 | Front Row: 3 |
| Result: | Small damage inflicted on front row of enemies. | ||
| Automatically learned when you reach Rank 5. | |||
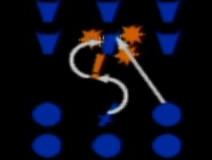
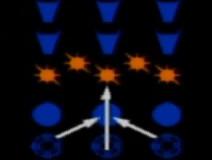
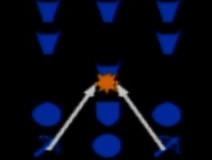
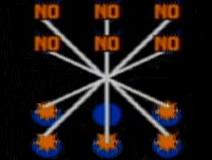
| Rush | 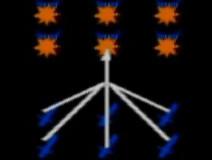 |
Party Rank: 3 | Both Rows: 3 or more |
| Result: | Your party will charge at all enemies. | ||
| Bought from the Guild for 2000 G. | |||
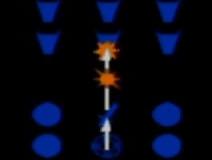
| Ninja Attack |
 |
Party Rank 8 | Front Row: 3 Ninja must be in front row |
| Result: | Increases damage to enemy from a mid-air attack. | ||
| Bought from the Guild for 52000 G. | |||
| Double Slash |
 |
Party Rank 3 | Front Row: 2 |
| Result: | Inflicts large damage to one enemy by an attack by 2 characters. | ||
| Learned from the Swordsman on B1. | |||
| Stun Attack |
 |
Party Rank 4 | Front Row: 1 ----- Back Row: 1 who can use Sorceror or Priest spells. |
| Result: | Render an enemy unconscious. | ||
| Automatically learned when you reach Rank 4. | |||
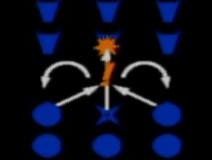
| Fake Attack |
 |
Party Rank 6 | Front Row: 2 |
| Result: | Fools an enemy to allow the other char. to attack from a different angle. | ||
| Bought from the Guild for 36000 G. | |||
| Hold Attack |
 |
Party Rank 4 | Front Row: 1 ----- Back Row: 1 who can use Sorceror or Priest spells. |
| Result: | Enemy becomes immobile. | ||
| Automatically learned when you reach Rank 4. | |||
| Jump Attack |
 |
Party Rank 5 | Front Row: 1 ----- Back Row: 1 who can use Sorceror or Priest spells. |
| Result: | A character can avoid an enemy attack. | ||
| *Note~ Character can still be hit by magic and breath attacks.* | |||
| Automatically learned when you reach Rank 5. | |||
| Warp Attack |
 |
Party Rank 8 | Front Row: 3 ----- Back Row: One who can use S or P spells. |
| Result: | An unblockable attack on 1 enemy by the front row. | ||
| *Note~ Characters can still be hit by magic and breath attacks.* | |||
| Automatically learned when Orphe becomes a Registered member. | |||
| Back Attack |
 |
Party Rank 4 | Front Row: 3 |
| Result: | 1 char. acts as a decoy while 2 other characters attack from behind. | ||
| Automatically learned when Rui becomes a Registered member. | |||
| Sacred Cross |
 |
Party Rank 8 | Front Row: 1 Knight ----- Back Row: 1 Priest or 1 Bishop. |
| Result: | Purifies or detroys immortals. | ||
| *Note~ Same rules apply as Dispel, it can fail.* | |||
| Bought from the Guild for 52000 G. | |||
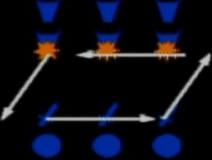
| End Lash |
 |
Party Rank 5 | Front Row: 2 |
| Result: | An attack on both ends of the front and back rows of enemy party. | ||
| Bought from the Guild for 28000G. | |||
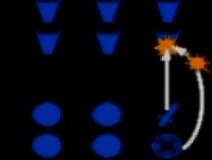
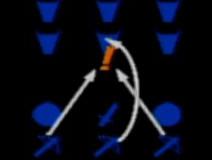
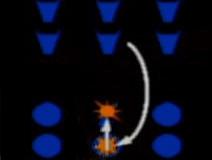
| Crisscross |  |
Party Rank 7 |
Front Row: 3 |
| Result: | An attack is made on an enemy thrown in the air while it is vulnerable. | ||
| *Note~ When successful, heavy damage is done to an enemy. If failed, only slight. | |||
| Bought from the Guild for 44000 G. | |||
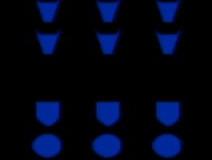
DEFENSIVE
These AA's are made for defensive purposes, just as the name implies. They are made to weaken or breakdown an enemies attacks.
| Front Guard |
 |
Party Rank 2 | Front Row: 2-3 |
|---|---|---|---|
| Result: | The party can be strongly defended by the front row, even from ill status. | ||
| Learned from the Swordsman on B1. | |||
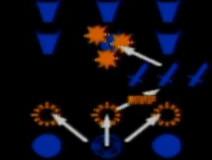
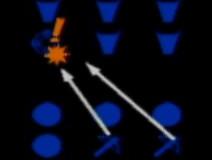
| Deploy | 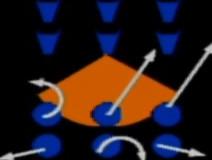 |
Party Rank 6 | Both Rows: 3 or more |
| Result: | Immobile party members cannot participate. Reduces "Breath" damage. | ||
| Bought from the Guild for 36000 G. | |||
| Spell Shell |
 |
Party Rank 6 | Back Row: 3 |
| Result: | A protective shield is cast by the back row to protect the party from enemy spells. | ||
| *Note~ By 'protect', they mean 'reduce the damage of'.* | |||
| Automatically learned when Michelle becomes a Registered member. | |||
SPELL
These set of AA's rely on spell power in battle. They are mainly used to increase one's spells, by either strengthing that spell's power or increasing it's range.
| Assisted Spell |
 |
Party Rank 6 | Back Row: 2, 1 person must be a castor |
|---|---|---|---|
| Result: | Increases the strength of the castor's spell. | ||
| Automatically learned when you reach Rank 6. | |||
| Sweep Spell |
 |
Party Rank 7 | Back Row: 1 of the 3 must be a castor |
| Result: | Increases the range of the castor's spell. | ||
| Bought from the Guild for 44000 G. | |||
| Silence Breaker |
 |
Party Rank 7 | Back Row: 3 |
| Result: | Cures a possessed character. | ||
| *Note~ This description isn't correct. It does not cure possession like it says, but instead it cures anyone who is afflicted with 'Seal' status.* | |||
| Automatically learned when Grace becomes a Registered member. | |||
| Spell Sword |
 |
Party Rank 5 | Front Row: 1 ----- Back Row: A castor |
| Result: | Overpowers an enemy curse if this AA is successful. | ||
| *Note~ This AA is intended to break an enemy's special protection that they might have (I.E. monsters that resist/barrier spells)* | |||
| Bought from the Guild for 28000 G. | |||
ASSIST
These AA's do not harm enemies directly, but indirectly. They are used by the Back Row members to halt an enemy attack on Front Row members or to stop a spell from being cast, as well as assisting with another members attack, adding more damage to it. Since these are physical attacks, they can miss at times.
| Assisted Shot |
 |
Party Rank 4 | Back Row: 1-3 | Party: Min. 2 |
|---|---|---|---|---|
| Result: | Projectile is thrown to aid accuracy of comrade. Can't combine with Assisted AA. | |||
| Bought in the Guild for 4000 G. | ||||
| Restrict Shot |
 |
Party Rank 3 | Back Row: 1-2 | Party: Min. 2 |
| Result: | Enemy attack is halted by a projectile thrown. Can't combine with Assisted AA. | |||
| Learned from the Swordsman on B1. | ||||
| Spell Cancel |
 |
Party Rank 4 | Back Row: 1-2 | Party: Min. 2 |
| Result: | Enemy spell is halted by a projectile thrown. Can't combine with Assisted AA. | |||
| Automatically learned when you reach Rank 4. | ||||
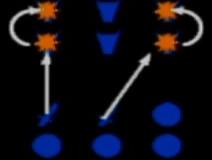
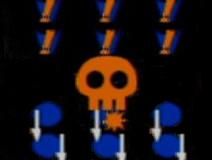
POSSESS
These AA's are a strange sort. I kept thinking to myself "What happens if everyone in the party becomes possessed?", "Will very, very bad things happen to me as a result of it?" "Mmm neh, could be.. let's find out.". This was pretty much done at my own curiosity, or stupidity... or both, as if you screw up testing this out, you could possibly lose one of your characters permenantly. These can only be obtained when ALL party members become possessed by the Reaper. It doesn't have to be a full group. Once this happens, the entire screen will glow red. In battle, you lose the Normal AA's as well as Flee Together, and are left with some new ones (The Possess AA's can't be viewed until you're in battle). These moves, however, are very dangerous to perfom as it usually results in taking damage, or outright killing a character permenantly. Other than the fact that they suck, they are kinda cool looking.
This took a while to do, as you have to get all members possessed and the Reaper doesn't show up as often the more people are possessed, according to my observation (it could just be me). When I actually attempted this little test I was at Rank 4 and when all were possessed I was open to using 3 Possess AA's. I assumed that you gain each one according to you're Party Rank, so I had managed to drop my rank down to 2 (I used Rank 2, because I also assumed the Possess AA's are similar to Normal AA's in that you have to be at least Party Rank 2 in order to start using AA's.) by replacing higher trust members with lower ones to offset the overall Trust level in my Party. Then I got the replacements Poss. as well, and.. poof, I had only access to 1 Possess AA. Then I got them to Rank 3, and I had 2. Then so on and so forth, until I was Rank 8. Okay, enough ranking... er ranting.
| Reaper's Blade |
 |
Party Rank 3 | Both Rows: 2 or more |
|---|---|---|---|
| Result: | A critical hit performed at the cost of losing half of a character's HP. | ||
| Soul Smash |
 |
Party Rank 4 | Both Rows: 2 or more |
| Result: | All enemies can be killed at the cost of losing a character. | ||
| Stealing Voice |
 |
Party Rank 6 | Both Rows: 2 or more |
| Result: | Stops an enemy from casting spells at the cost of losing half of all character's HP. | ||
| Spirit Healing |
 |
Party Rank 6 | 1 or more injured characters |
| Result: | Leader heals the same amount of HP inflicted on other characters. | ||
| Deceptive Slip |
 |
Party Rank 2 | Both Rows: 2 or more |
| Result: | At the expense of a member's HP, fleeing is certain except some monsters. | ||