

Walkthrough
This section contains detailed information regarding the quests/tasks for each area. You can explore the map here: clicking on any area will take you to its quests, and hovering your mouse will display the name of the location (I know it's a bit hard to see, but the full map is huge!). If I missed anything, or got anything wrong, please contact me and I'll make any corrections needed. Also, almost any quest can be completed through mindless violence, even if I don't explicitly mention it (such as killing Slim in Klamath and taking the key rather than bartering / bribing / convincing him.
Before I even dive into the walkthrough, there are two major things that I need to say:
If this is your first time playing, don't use a walkthrough unless you are completely stuck (which is rare in Fallout 2).
Download the 1.02 patch immediately if you're not already running it! Patching later will invalidate your old 1.00 save files!

1. Arroyo
Things to do:
- Complete the Temple of Trials.
- Kill the Plants of Dark Soul from Hakunin's garden.
- Find Nagor's dog Smoke.
- Recieve free training from Lucas, Jordan, and Cameron if you meet the requirements.
- Fix the well.
- Upgrade your spear to a sharpened spear at Mynoc the Bridgekeeper.
- If you attack Klint or Cameron (outside of the final trial) all of Arroyo will be hostile when you leave the temple.
- The scorpions in the temple can poison you, which can be a problem at this point.
- Each time you attempt to steal from the villagers in Arroyo (even if you don't take anything) you lose 1 Karma, which can prevent Hakunin from healing you or mixing healing powders.
All characters start the game at the entrance to the temple of trials, with Klint standing nearby (who is of no use whatsoever), and a spear in their inventory. Equiping the spear is only a good idea if you tagged melee weapons, otherwise your unarmed skill will doubtless be higher. With or without the spear, the enemies should fall quickly. While completing the temple of trials be sure to save often, and don't hesitate to run. A good strategy for characters with decent AG (and therefore enough action points) is to take a swing in combat and then retreat, as most hand-to-hand enemies will spend all their action points chasing you, and be unable to retaliate while you wittle away at them. After the first room you will have to pick the lock on a door to get to the next section (use the left-click menu and pipboy icon, or simply use the skilldex). In the traps hall (a bit after the locked door) you can use your traps skill (via skilldex) on each raised plate for 25 xp, if you trip the traps you can retrieve the sharpened poles off the ground, or, if you're like me, you double click and run through this section without looking back. After a few more ants are dead, you have to use the pastic explosives from a nearby pot to blow open the next door (Left-click on it to get to the "Use" icon from your inventory to set the timer for 10 or 20 seconds, then drop it before the door, and back away). While later in the game a poor traps skill can cause explosives to prematurely detonate (killed myself a few times like that), that won't happen at this point, even if you have 0% traps, or even a negative traps skill. At the end of the last room you face Cameron, and there are three options depending upon what skills you tagged.
- Fight Cameron (without access to the spear or healing powders you may have found) and win (300 XP)
- Talk Cameron out of fighting (if you tagged speech) (600 XP)
- Steal the key from Cameron and open the door (if you tagged steal) (600 XP)
- Cameron will boost your unarmed and melee skills by 10% if your AG is lower than 6 and you did not tag any combat skill.
- Lucas will boost your unarmed skill by roughly 15% if your AG is at least 6.
- Jordan, in the tent northeast of Lucas, will boost your unarmed skill by 10% if it is already higher than 36%.
2. Klamath
Things to do:
- Refuel Whisky Bob's Still. (Max 100 XP)
- Rescue Smiley the trapper. (Max 500 XP)
- Deal with the rats of trapper town. (Max 500 XP + Combat XP)
- Recruit Sulik into your party. (Max 1000 XP)
- Help or hinder Torr and his brahmin (Moo-moos!). (Max 1450 XP + Combat XP)
- Many NPCs in Klamath won't give you a warning if you are caught stealing, NPCs in other towns often will.
- Talking to Torr will allow you to help guard the Brahmin, but make sure to do it the first time, he won't speak to you again if you don't.
1. Refuel Whisky Bob's Still
While generally easy, you may want to put this off until you've rescued Smiley and gotten the Gecko Skinning perk, the golden pelts can fetch decent money.
Whisky Bob is located in Buckner's place, right inside of town. If you buy him a drink ($5) he'll tell you what's going on in town and offer you a job. This is one of the only timed quests in the game, he gives you one day to refuel the still. Located in the hunting grounds south of town, the still is inside a small shack. Once you've fought your way through a few Geckos (and maybe a golden gecko or two) use the wood inside the shack on the still via the left-click menu, netting you 100 XP and $50 when you return to Whisky Bob. Once you complete this quest you can no longer get the 100 XP, $50, and free beer from Sajag for revealing the location of Bob's still. However, if you fail to complete the quest within the day, you can still get the rewards from Sajag for betraying Bob.
2. Rescue Smiley the trapper
If you enter dialog with Adrien Buckner she will ask you to rescue Smiley, and will mark the Toxic Caves down on your map. The rest of this quest is detailed in that subsection. As a reward for bringing him back to Klamath safely, he will teach you how to skin geckos for their semi-valuble pelts as well as raise your outdoorsman skill a bit. Upon returning Adrien will give you $100, or Sulik's freedom if he isn't free already (500 XP).
3. Deal with the rats of trapper town
You learn about the rat problem in trapper town by talking with Whisky Bob in Buckner's place or by talking to Slim in trapper town. In order to get past the door to back-end of trapper town you can either convince Slim that you'll take care of the rats, steal the key from him, barter it from him ($1), pick the lock, or give a jerky to the wondering dog in the main portion of Klamath (definitely the most fun). In the mall area after the locked door there are lockers with rubber boots and bullets, both of which will be handy for the toxic caves portion not to far ahead. Once underground you can work your way down through two floors of rats before encountering Keeg R'aat. Killing him will net you 300 XP in addition to combat XP, as well as increase your standing in Klamath. If you explore further, and get past several mole rats and a locked door (explosives work), you can get a fuel-cell regulator (and 200 XP, though it doesn't show in the status window) that will be required for the car later in the game.
4. Recruit Sulik into your party
(Note: See Help or Hinder Torr for a different method of freeing Sulik.) Sulik is my personal favorite npc (read more in the party npcs section), if only for his dialog and lasting usefulness. He can be found in Buckners place, and owes Maida Buckner $350 for damages he incurred while drunk. If you do recruit him, be sure to take his leather jacket through the trade dialog, he usually has more hit points than the player, and armor is expensive. There are three ways to get him in your party:
•Pay the $350 he owes directly to Maida Buckner.
•Give Sulik the $350 he owes through dialog (rewarding 500 XP).
•Rescue Torr or Smiley and ask for Sulik's freedom instead of money (500 XP)
For most XP: Ask for Sulik's freedom after rescuing Torr (500 XP), then talk to Sulik and give him the $350 (without talking to Maida Buckner) for another 500 XP.
5. Help or Hinder Torr
Torr, usually around the same area, is a very dumb tribal standing near Buckner's saloon. If your character is stupid as well, they will carry on a sophistocated conversation, otherwise he sounds like a fool. Either way, he'll ask you to help guard some brahmin. You have some options once you are in the field:
•Talk to the Duntons and agree to help rustle the Brahmin, and do so, netting you $50, 5 jerky, and 150 experience.
•Kill all the scorpions (bugmen) for 250 XP (plus the combat xp from the scorpions).
For most possible XP: Agree to guard the brahmin, agree to rustle the brahmin, convince the Duntons to run (250 XP), convince Torr to run (enables rescue Torr, but 0 XP), kill the scorpions (combat XP), rescue Torr from the canyon (200 XP + combat XP), go for Sulik's freedom as a reward (500 XP), talk to Sulik before talking to Maida, and give him the $350 (500 XP).
2b. Toxic Caves
Things to do:
- Rescue Smiley the trapper.
- Raid the lower floor for armor, weapons, and ammo.
- Taking 15 or more steps in the glowing goo without rubber boots in your inventory will cause you to grow an extra toe after a few months.
- Avoid the lower hallway on the second floor, as it has the most geckos.
- If you travel here in your car, the trunk will not be accessible, as it lies in the exit grid.
If you're playing a sneaky character, and make a backup save, Smiley has about 10 golden gecko pelts in his inventory that will sell for a good deal, and it's quite easy to steal from him in the caves.
3. Den
Things to do:
- Note: If you're female and named yourself Buffy, wear any type of leather armour and talk to Becky. She'll give you $1000, 5 Stimpaks, a set of metal armor, a 10mm SMG, 120 rounds of 10mm JHP, a plasma grenade, and a flower!
- Deliver a meal to Smitty (Max 150 XP)
- Help out Becky (Max 300 XP)
- Listen to a few stories (Max 550 XP)
- Bring Anna's soul to peace. (Max 1450 XP + combat XP)
- Tip the balance of a gang war (Max 2500 XP)
- Find (and free) Vic AND/OR Become a slaver (Max 2950 XP + Combat XP)
- Get your car!
- The kids at the entrances to all the shops will attempt to steal from you when you walk by. No one will go hostile if you are caught attempting to steal from them though. If you realize that your important items are gone, and the kids don't have them, it will be in the barter inventory of the shop they are outside of.
- UK VERSION: Since children were left out of the UK version, you will be unable to get the items they steal from you back until they show up in a shopkeeper's inventory. I reccomend installing the children patch.
1. Deliver a meal to Smitty
Very simple, ask Mom on the east side what there is to do, agree to deliver the meal to Smitty. Head for the west side, Smitty is in the shack to the left of Tubby's shop. He'll thank you with a stimpack and 150 XP.
3. Help out Becky
Becky, the owner and bartender of the casino just near the entrance to the west side of the Den, has two tasks for you. First she'll ask you to retrieve $200 that Fred borrowed, he can be found around Flick's shop just to the south, and looks like all the other junkies. He'll ask you to cover half his debt, which will allow you to break even since Becky lets you keep half. There's no reason to give him any more, after several months he'll have struck it rich and want to pay you back (quite well, too: $2000, 200 Small Energy Cells, 250 Micro-Fusion Cells and one Plasma Grenade), and a scripting bug causes him to always give you the biggest reward, even if you didn't do more than cover half his debt. After that, Becky will ask you to find a book that Derek borrowed from her, 'The Lavender Flower'. Though you can find him, he's no use, his dialog gives no real hints and he just tells you he forgot where he left it. It appears on the ground in one of four locations in the east side of the Den: In the graveyard, by a barrel south of the graveyard, in the outhouse north of "The Hole" (the bar), or hidden behind a broken wall to the right of the slaver's guild. Return the book to Becky for 300 XP and $80.
3. Listen to a few stories
There are two NPCs in the Den with stories to tell, stories that you get XP for hearing. First, in Becky's casino on the west side of the Dan is Leanne at the bar, who'll tell you about the 'Master' if you buy her a Nuka-Cola ($5), netting you 350 XP for listening. On the east side of the Den, in Mom's, is Stacy, who'll tell a heart-wrenching story about her cat cuddles, giving you 200 XP.
4. Bring Anna's soul to peace
You learn about this from either the charlatan in the south-most building on the west side of the Den, or by talking to mom on the east side of the Den about the haunted house. At midnight each night, the ghost of Anna appears in the room adjacent to Ananias's room. Talk to her until she reveals that she wants her locket. Talk to mom on the east side of the Den to learn that Joey has the locket. To get it from him you must either buy it from him ($50), threaten him with Anna's revenge (requires 7 INT), or threaten to hurt him (5 STR and a speech check). If all else fails you can kill Joey and his friends and no one will mind. When you give the locket to Anna (250 XP) she'll leave behind a pile of bones, a shovel can be found in the bookcase in the same room. Go to the graveyard on the east side and dig up Anna's grave, place the bones in it, and re-bury it (use the shovel again). Doing so will net you 1200 XP (status window says 600, this is wrong). If you don't mind becoming a gravedigger (no real effect, but some people avoid it) you can dig up the other graves. Each opened grave will cause you to lose 5 karma, and the most useful things in the graveyard is a radaway, about $70, and a few bullets.
5. Tip the balance of a gang war
In the building south of Tubby's shop are a bunch of armed thugs, led by Lara. Talking to her starts a string of quests:
•She'll ask you to find out what's in the church on the east side of the Den. If you pass a speech check (between 50% and 70% should work) or have at least 8 STR Tyler will let you in. If you fail the speech check, rest an hour and try again, he'll eventually let you in. Getting in nets you 500 XP (You get 700 XP if you do this before talking with Lara at all, and only 300 XP if you're already a slaver). When you examine the crates you get another 500 XP. Return to Lara for $200 and the next job.
•Next you must get permission from Metzger for Lara's gang to attack Tyler. Head to the slaver's guild on the east side and talk to Metzger, return to Lara for an easy $50.
•Lara wants you to find a weakness in Tyler's gang. Simply talk to him a few times, and he'll eventually talk about a party. Return to Lara for 200 XP, but no cash (yet!).
•When you return to Lara this last time, she asks if you're ready to attack. If you say no, you can tell Tyler about the attack and he'll ask you to take out Lara when the fighting begins. This earns you 1000 XP when the combat ends.
•If you side with Lara you get 1100 XP when combat ends. No matter who you side with, you get $400 from Lara, either as a reward or from her corpse.
6. Find (and free) Vic
Vic, the one who brought the holy flask to your village, the one who eluded you in Klamath, is indeed in the Den. However, he pissed off Metzger, and is being held as a slave. First you have to get in to talk to Vic, which means either bribing the guard $300, or passing a speech check. Vic will tell you that he needs his radio from Klamath (not a generic one, it has to be "Vic's Radio") to fix Metzger's radio. Even after you bring it, Metzger will ask for $1000 for Vic's freedom. If you're female and have CH of 6 or higher, you can sleep with Metzger for a $500 discount. I prefer to leave Vic here and return later when I have more firepower, and simply slaughter all the slavers. No matter how you free Vic, it gets you 200 XP and the option to have him join your party (read more in the party npcs section) (if nothing else take him to vault city, there's an event that requires him there). If you manage to kill Metzger you get 1500 XP (in addition to combat XP), another 1250 XP if you tell the slaves that they're free, and $1000 from Becky if you tell her that you killed him (has to be the "put up a good fight" dialog).
6b. Become a slaver
If you really want to play evil, you can become a slaver. Doing this means that some important NPCs won't even talk to you any more, like Sulik, Cassidy, or the Wright family in New Reno. By becoming a slaver you can go on slave runs organized by Metzger in which you get to kill "unruly slaves", which quickly ruins your karma and can make you hated pretty much everywhere that checks karma. Also, if you fail to kill all the armed slaves, Metzger will attack you when you return. Note that you can sell your NPC friends into slavery without actually becoming a slaver, but your barter skill inversely affects the prices (the higher your barter, the less you'll get for them). At about 100% barter you get the following: $1300 for Cassidy, $900 for Davin, $1100 for Miria, $800 for Myron, and $1200 for Sulik.
7.Get your car!
You can't get your car until you've brought a fuel cell controller (from Gecko) to Smitty and have the $2000 he asks for on hand. He also will install the fuel cell regulator found in Klamath for $750, which cuts the car's energy use by half. If you really don't have the money, or are simply evil, you can kill Smitty and install the fuel cell controller yourself, but only if your repair skill is 110% or higher, and even then, you can never install the fuel cell regulator, so it's not really worth it. On a strange note, you can put stuff in the car's trunk before you buy it, but using any skill or item on the car itself will cause Smitty to get mad, and then turn hostile if you persist.
4. Modoc / 4b. Ghost Farm
Things to do:
- Heal Bess the Cow (Max 200 XP)
- Guard Grisham's brahmin (Max 250 XP)
- Clean out Farrel's Garden (Max 300 XP + Combat XP)
- Find Cornelius' Gold Watch (Max 2000 XP + Combat XP)
- Find Johnny (Max 2500 XP)
- Help the town make peace (or war) with the Slags (Max 4700 XP)
- Get married (!)
- If you kill Jo or Grisham, and then attempt to trigger the shotgun wedding, strange things will happen when it tries to move either NPC into place.
- If you trigger the outhouse explosion, the downtown map actually changes. Any dropped items or party NPCs left there will vanish.
- If you tell Jo about the bodies before telling him about Karl's whereabouts, you won't be able to send Karl back from the Den.
- If you're playing a version without children, the Johnny quest obviously won't be completeable.
1. Heal Bessie the Cow
There is a cow behind Grisham's place that has a broken leg, with a doctor skill of about 30% you'll be able to heal her, getting you 200 XP. Afterward she'll follow you around until you leave the map, but if you talk to Grisham you'll have the option to have poor Bess slaughtered (netting you 100 jerky after a few days), or netting you karma boost and reputation drop if you decide to release Bessie from the pens.
2. Guard Grisham's brahmin
Talk to Grisham and attempt to leave the conversation, and he'll offer you this job. Accepting it will teleport you directly to the pasture. After a second or two a dozen or so dogs will enter from the north. Burst weapons work well if you can avoid hitting the Brahmin, and party NPCs will often hit Brahmin accidentally, and ocasionally on purpose (never figured out why). Once they're all dead you'll return, and Grisham will give you $1000, minus $100 for each brahmin that died, as well as 200 XP.
3. Clean out Farrel's Garden
On the north end of Modoc you can find Farrel, and assuming you haven't yet gotten on his bad side over the gold watch (more on that later), he'll ask you to help clean out his garden. He'll lead you to his garden and there are about 12 rats, normal and pig rats, to kill. You'll get no money for it, but 300 XP in addition to combat XP. Also, you are rewarded with "A warm fuzzy feeling that goes all the way down to your toes."
4. Find Cornelius' Gold Watch
The city-wide feude between Farrel and Cornelius over the gold watch can be resolved in a few ways. You learn about it by talking to either of the two men. If you attempt to open Farrel's safe, you can tell Cornelius that Farrel has his watch, they'll fight earning you 500 XP. If you want to actually find and return the watch, grab some dynomite (if you don't have some already, Jo likely has some easily stealable from his shelves). and jump down the outhouse right be the Bed and Breakfast. Plant the explosives near the rocks, and then quickly climb the ladder. For covering downtown Modoc in excrement, you gain 500 XP! Go back down into the outhouse and find the gold watch, it's guarded by a mole rat. The only bag (that I know of) in the game is located here as well. If you're having trouble finding either the watch or bag, here are some images.
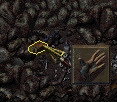 | 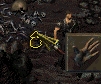 |
| The gold watch | The bag |
After you gotten the watch, you can return it to either Farrel or Cornelius for 1500 XP, but if you say Farrel had it you'll only get 500 XP. Cornelius is crazy as a bat, and accuses you of being a theif if you return the watch (you still get the XP, and no one else seems to care). I usually give it back to Farrel anyways, he's more grateful.
5. Find Johnny
With PE of at least 6 you'll be able to ask Balthas (the tanner in southern Modoc) what's bothering him, and with IN 6 you'll be able to offer to find Johnny. Depending upon which dialog branch you follow, you might get Laddie to join your party (only for the duration of the quest though). Talking to Laddie will hint that Johnny fell down the well, and exploring there (click once to clear the boards, use the rope, then go down) you'll find Johnny's BB gun. Returning to Balthas with it will cause him to have a breakdown (and he'll take the gun, worth $300), but you'll get no XP for it. After you've secured an agreement between Modoc and the Slags, head to the northern end of the Slag caves and find the boy with dialog (or the one that Laddie runs up to) and tell him his father's name is Balthas. Return to Vengir and he'll teleport you back to Modoc, netting you a combat leather jacket and 2500 XP.
6. Help the town make peace (or war) with the Slags
Talking to Jo will start the quest to help the town of Modoc escape its drought (While it is possible to get him to cut off his finger, you don't get it. It just hurts your karma). The first thing he asks you to do is investigate the ghost farm. This consists of traveling there and falling through the floor of the small house. This is where the options begin: You can choose to kill all of the slags and return to Jo, which ends the entire quest line, dooms the town of Modoc, and earns you 500 XP and combat XP. Alternatively, you can meet the leader of the slags and agree to take their message to Modoc. Returning with the message will gain you 700 XP, but Jo will want proof that the slags mean well. If you've already met Karl in the Den, the first part should already be taken care of. If not, walk (or drive) back to the Den and ask Karl (in Mom's diner) to tell you his story, then return to Modoc. On foot, this leaves you with a handfull more days before Modoc attacks the Slags. After informing Jo about Karl's whereabouts, you can convince him that the bodies are fake one of two ways: simply examine one of them at the entrance of the farm, or ask Vengir about them. Either way, when you return to Jo with the information, it seals the deal between Modoc and the Slags, netting you 3500 XP. If at any point you take the "I want out" dialog option, you'll get 700 XP and Modoc will get its "bad" ending. If you allow the time to run out, the people of Modoc will attack the Slags and you'll get no reward. Afterward you can return to Vengir and tell him about the agreement for a free assualt rifle. If you return to the Den and send Karl home, you'll get another 500 XP.
7. Get Married (!)
With CH of 8 you can get married to either Davin or Miria at Grisham's house by trigging a shotgun wedding. If you don't have the CH required, Gisham will turn hostile! Note that regardless of how it turns out, once you choose the sex dialog all of your items are dropped on the ground, which can be a real pain if you have a lot of items. Both Davin and Miria are useless as they cannot gain levels, and have no useful skills, but you can sell them into slavery if you want!
5. Vault City
Things to do:
- Find Mr.Nixon for Curtis (100 XP)
- Fix the broken Auto-Doc (100 XP)
- Fix the rattling vent in the vault (100 XP)
- Detox Charlie (Max 300 XP)
- Get a plow for Mr.Smith (250 XP)
- Gain entrance to the inner city
- Clean up the groundwater pollution coming from Gecko
- Win Joshua's freedom (500 XP)
- Take care of a few deliveries (500 XP)
- Become a Citizen of Vault City (Max 1000 XP)
- Do some scouting for the city guard (Max 1100 XP)
- Pick up a few special perks!
- Don't talk to Lynette unless you absolutely have to, she has a habit of banning you from Vault City forever for the slightest thing (Like helping Gecko, or having Lenny or Markus in your party). You can get citizenship papers from Senator McClure, and he's nicer anyways.
- Be sure to get the wrench from the Curtis before freeing Joshua, as the entire family leaves Vault City after you complete that quest, and wrenchs are fairly rare.
1. Find Mr.Nixon for Curtis
In the courtyard area of Vault City, just north of the "Welcoming Center" you'll find Curtis (assuming you're not playing the childless UK version). His floating text will mention Mr.Nixon, and the doll can be found behind the bar (looks like a box on the ground). You get 100 XP for returning it, but wait a minute or two for Curtis' new float-text to go by, once he mentions that he hid the wrench in the rocks behind the bar you'll be able to get it. If you don't stick around for the float-text, you won't get the wrench (which you'll need very soon now).
2. Fix the broken Auto-Doc
The autodoc is located in the tent just west of Cassidy's bar in the courtyard. Fixing the autodoc requires roughtly 50% repair skill, less if you use a tool.
2. Fix the rattling vent in the vault
When you gain access to the vault (either by being a citizen or by using the combat-mode trick), go to the second floor down. If you have a high enough perception, you'll see float messages by the vent in the upper-right corner. Use repair on it (don't think it requires any skill 10% did it fine for me) for 100 XP and 50 microfusion cells. If you don't pass the perception check, go to the third floor and stand near the central computer. It will eventually show a float-text mentioning ventilation problems on the second floor, enabling you to fix the vent.
2. Detox Charlie
Located in a tent just south of the bar, Charlie isn't doing too well. First use your doctor skill on him, which will tell you that he's radiated, and requires medicine (100 XP). Use a dose of RadAway on him for another 100 XP, and when he finally thanks you, you gain the final 100 XP.
2. Get a plow for Mr.Smith
You'll find Mr.Smith in a tent north of Cassidy's bar, talk to him and you'll learn that he needs a plow. Pay harry, across the street, $800 (or $600 with decent barter) and he'll take it over to the Smiths place. You'll get 250 XP for the good deed, and he'll give you a Desert Eagle .44 pistol (loaded with 8 rounds) and 20 extra rounds of .44 magnum JHP. Easily worth the $800 at this point in the game.
3. Gain entrance to the inner city.
There are several ways to gain entrance (via a day pass or fake citizenship papers) to the inner portion of Vault City:
•Talk to Wallace while wearing your vault suit (remove your armor), and you'll get a day pass.
•Show Wallace a gecko pelt, gold nugget, or uranium ore and he'll charge you $500 for a day pass.
•Claim that you want to sell your party NPCs into slavery and he'll charge you $500 for a day pass.
•You can steal a day pass from Wallace.
•You can enter the customs office at night and lockpick the locker, which has a day pass in it.
•With high speech and INT you can convince Wallace that you must talk with the first citizen.
•You can offer to find the raider's base, and do so.
•(This is my favorite) Talk to Skeev and buy the fake papers from him for $200, threaten to expose him to Wallace and he'll give you $300 back. You can turn him in, but you lose your fake papers. After turning him in, it is possible to get a day pass from Wallace if you have around 75% barter.
4. Win Joshua's freedom
If you talk to Amanda, Curtis' mother, you'll learn that Joshua, her husband, has been imprisoned inside Vault City as a servant because he started a bar fight. If you want to help her, there's XP and a bit of money to be gained. Once you've gained entrance to the inner city, find the servant allocation center and talk to Barkus. If you have decent speech skill (lower required if you're a citizen and not in with a day pass) or have a high doctor skill, you can convince Barkus to release him. Otherwise, you can bribe him, but that runs between $250 and $1000 depending upon your barter skill. Regardless of how you free him, you get 500 XP. Return to Amanda in the courtyard and she'll thank you with $32. If you're male, you can have sex with her instead, but that's more than a bit evil.
Take care of a few deliveries
First
Become a Citizen of Vault City
Usually this is done by completing the Gecko quest, but there is an alternative way: taking the standard citizenship test. The requirements are pretty stringent, 9 IN, 9 PE, 9 LK. Unless you chose to be a hyper-intelligent sniper, or got the last bump up to these stats from either zeta scan, it's likely you won't pass. Also, any extra toes must have been removed to pass the physical examination. If you pass, you'll get a set of legitimate papers, as well as 1000 XP.
Do some scouting for the city guard
This is a two part quest gained from Stark, the head of the guard, located in the building just outside the vault entrance. If you ask to help he'll first ask you to scout (meaning walk around, being sure to clear the fog of war from the entire grid-squares around it) around Gecko, giving you $300 and 350 XP when you return. Then he'll ask you to do the same for NCR, giving you $500, 750 XP, and a motion sensor. If you do this later in the game, you might already have these areas cleared, meaning he'll just hand you a bunch of cash, XP, and a motion sensor!
Clean up the groundwater pollution coming from Gecko
You find out about the groundwater pollution by talking to Senator McClure, possibly the only sane person left in Vault City, and the sensible alternative to ever speaking to Lynette. Since the majority of this quest occurs in the city of Gecko, this quest will be detailed in that section, but know that completing this quest will gain you citizenship only if you tell Senator McClure about it.
Pick up a few special perks!
While in vault city there are a few special perks, being bonuses that will appear on your perks screen but do not need to be selected by the player. Within vault City, they are as follows:
- Vault City Medical Training - With a Doctor skill of at least 75%, Dr.Troy (inside the actual vault) will give you +5% to both your Doctor and First aid skills.
- Vault City Innoculations - If you come to Dr.Troy while poisoned or irradiated, be sure to ask about the innoculations, which will give you a permanent +10% to both radiation and poison resistance.
- Alcohol Raise/Lowed Hitpoints - Go to the Parlor Room (just south of the counsel in the north-most part of vault city) and order lots of z-Alcohol, 100 bottles to exact. After downing 100 of them you'll gain either an Alcohol Lowered Hitpoints (Between -1 and -4) or Alcohol Raised Hitpoints (Between +1 and +4). The perk you get is based off of your luck statistic, with less than 8 or 9 luck you'll likely lose hitpoints.
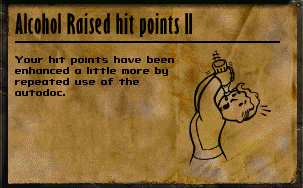
The alcohol perk on my 10-Luck sniper, note the typo.
Note: This is where you learn about both types of implants (and hence become able to ask about them): with either science 55% or doctor 80%, use the computer terminal behind Phyllis inside the vault. While it is possible to get both Dermal Impact and Phoenix implants done in Vault City (the doctor in the courtyard), it is far cheaper to get them done in Redding, so it will be detailed in that section. Also, if you haven't repaired the auto-doc, you'll die when you attempt to have the implants put in!
5b. Raiders
Things to do: Warnings:
- If you enter through the manhole, when you come back up your car will be missing. Usually to remedy this, all you need to do is go to the world map and return to raiders.
- If you have any doubts about your abilities, save first! Raiders cause a lot of problems for lower level characters.
Kill the Raiders!
Just for finding the raider's camp you get 500 XP, There is no way to avoid killing the raiders, and no alternate completion method (there are hints that the developers wanted the silent tribal to provide an alternative, but it was never put in the game). When you first find the raider's base, an outdoorsman check is run. If you pass, you'll enter near the well, if you fail you'll enter at a cave entrance. Coming in from the well is easier as it prevents the raiders from sniping you, as well as saving you from tripping through the mines, collapsing floors, and giant radscorpions that litter the cave path. There are quite a few raiders, many with FN FALs and other small arms. With decent sneak skill, it is entirely possible to take them out a few at a time, otherwise it can become difficult. Once you've killed the majority, you'll be awarded 2000 XP for breaking the raider's strength. Travel back to Vault City and report your victory to Lynette. It's important to decline a cash reward because if you ask for one Lynette might decide to kick you out of the city and revoke your citizenship. Besides, not asking for cash yields 1000$ and 1000 XP!
Find Evidence of Bishop's Involvement
Several of the stronger raiders look like they are wearing green combat armor, check their corpses for dog tags. Once you have all three sets, find the safe in the northwestern corner. Be sure to examine it for traps first, as it is rigged with explosives. On a side note, if you are very dim (low INT) and high luck, you'll have the option to randomly spin the dial on the safe, unlocking it at random. Inside the safe is an account book that details Bishop's involvement with the raiders. Take this back to Lynette as well for an additional 500$ and 1000 XP
6. Gecko
Things to do:
- Fix the Power Plant (Max 4500 XP) OR Destroy the Power Plant (Max 3050 XP + combat XP) OR Do both!? (7550 XP + combat XP)
- Get Harold to join your party
- Optimize the Power Plant (2500 XP)
- Get a fuel cell controller from Skeeter (250 XP)
- Find a part for Skeeter (Max 1050 XP)
- Find Woody the Ghoul (1000 XP)
1a. Fix the Power Plant
Harold, the tree headed Ghoul in gecko, will tell you that the plant needs a new hy-mag regulator, and vault city is the place to get it. Don't approach lynette about it, she'll simply ban you from the inner city permanently. Talk to McClure and he'll send you over to amenities to get the regulator (which has a pretty animated inventory image.. wee). Take it back to Gecko, and install it. There are three ways to do this: With decent repair skill, do it yourself (use it on the red-wheel in the reactor), suffering massive damage and radiation levels, netting 4000 XP, convince Festus with a decent speech to do it himself getting 4250 XP, or install it using the robotic system 4500. That last one requires some explaination. In the room immediately before the reactor there is a control panel, use it. For the first three access codes, pick the one with an A, then B, then C. In the manual programming, give it the names of the parts that lead up to the red wheel. These names can be determined by examining each of the machines in turn.
1b. Destroy the Power Plant
This is the more evil option, and there are several ways to do this. All of the require you to get deep into the power plant and turn off the coolant valve by some means. You could just walk into the reactor yourself, soak up tons of radiation, take a lot of damage, pass a handfull of strength checks when you try to turn the valve, and get no XP reward at all. A better option for the evil path is to get either the robot or Hank the ghoul to do it for you. With the robot you'll need to do a similar squence as above, but rather than telling it to install the new regulator, you tell it to shut off the valve. To get hank to do it, simply hand him the coolant report (taken from the building with Harold in it) and he'll drag himself over and shut it off. Both of these methods net you 550 XP at the time, and 2500 when you escape, and both leave the ghouls hostile toward you. If you destroy the power plant with any of these methods, Gecko will become inacessable (except the junk yard) immediately afterwards.
1c. Do both?!
As counter intuitive as it may sound, the way to get the most XP out of the situation is to complete one of the above, then do the other. For the most experience, install the part using the robot, then get either Hank or the Robot to turn off the coolant valve. You'll get 4500 for fixing the plant, 550 for shutting off the coolant, and 2500 when you escape! However, this may not be the thing to do if you're not evil or would like Gecko to exist later on. Just remember, there is no "good" ending for Gecko.
2. Get Harold to join your party
Assuming you're not at your limit for party members, and want harold on your side, all you have to do is tell him that you're the decendant of the vault dweller. Following that conversation thread will quickly lead to the option to ask him to join you. If he does, you'll get a boost to your reputation in Gecko, even if you immediately ditch him.
3. Optimize the Power Plant
Clearly you can only do this after not blowing it up (i.e. Fixing it). Talk to Festus to get the reactor disk and take it to vault city. If you talk to McClure about optimizing before telling him that you fixed the plant, he'll optimize the data for you. If you tell him about fixing the plant first, he'll make you a citizen. Being a citizen means you can access the vault itself and make your way to the main computer and optimize the data yourself. Extra footwork, but you might already be a citizen at this point. When you return the optimized disk to Festus you get another 2500 XP.
4. Get a fuel cell controller from Skeeter
In order to get your car up and running, you'll need the fuel cell controller that Skeeter, a ghoul in the junkyard portion of Gecko has. In return, he asks for a Super Tool Kit. If you did the tools quest in Vault City you should have a spare one, you can also buy the kits from Smitty in the Den on occasion. If you choose to kill Skeeter, he'll have the controller on his corpse, and the other ghouls don't seem to care, but it prevents you from doing later quests for, and getting weapon upgrades from Skeeter. If you trade for it, you'll get 250 XP as well.
5. Find a part for Skeeter
Skeeter wants a three-stage plasma transformer. Jeremy in the power plant has the part, but will only give it to you if you have a part requisition form. Harold has one you can steal, you can steal one from Festus (or talk him out of it, or barter it from him), or you could just pickpocket Jermey. In fact, you can do all three and get three transformers, which is good because Skeeter doesn't seem to stop needing them. For each one you bring back he'll give you 350 XP and a free weapon upgrade. Do it three times for a total of 1050 XP!
6. Find Woody the ghoul
Talk to the ghoul in the small shed in the junkyard and he'll ask you to help find his friend Woody. Head back to the Den and pay the charleton (next door to the haunted room with Anna, straight south from the north entrance to town) 25$ to see the "Mummy". Wake Woody up and net 1000 XP, return to Gecko and pick up a couple Rad-X and radaway for your efforts.
7. Redding
Things to do:
8. Broken Hills
Things to do:
9. New Reno
Things to do:
9b. Golgotha Plains
Things to do:
9c. Stables
Things to do:
9d. Sierra Amry Depot
Things to do:
10. New California Republic
Things to do:
11. Vault 15
Things to do:
12. Vault 13
Things to do:
13. Military Base
Things to do:
14. San Francisco
Things to do:
15. Navarro
Things to do:
16. The Enclave
Things to do:
Fallout 2 Patches
Remember that updating Fallout 2 from 1.00 to 1.02 will invalidate all old save games, meaning you'll have to start over. I'd say it's worth it simply due to the number of improvements in 1.02. Most of the re-releases of Fallout 2 (such as the Fallout 1 / Fallout 2 double CD version) are already verison 1.02, you can check your version by looking in the lower right-hand corner of the fallout 2 menu (right after the interplay logo and video).
In addition, I reccomend downloading Killap's Patch, a fan patch that fixes TONS of bugs, missing scripts, and weirdness in Fallout 2. This patch is available for the US version, the UK version, and the Macintosh version. All versions of Killap's patch can be used on version 1.00 or 1.02. If you happen to need Killap's version B patch (if you bought a rerelease that is version 1.02, but lacks the patch data file), it can be found in the No Mutants Allowed download section.