
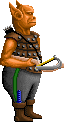
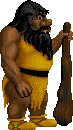
The Barbarian

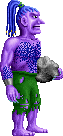
Lord Slayer


Each castle has a different crest depending upon the colour of the player. In this case
the green crest is that of Lord Slayer, the most offensive leader of them all (literally).


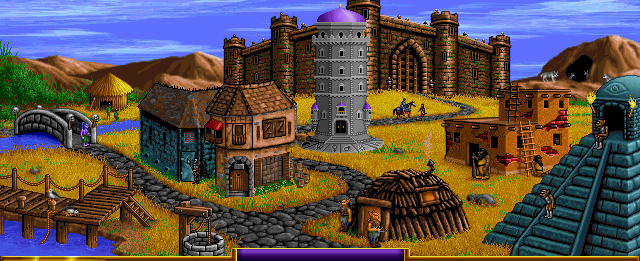
Barbarians love Baroque so much that they make their enemies' faces Baroque.
Barbarian Town Creatures
Here is a rundown of the Barbarian/Plains town and its base
creature
statistics. Learn them well.
| Barbarian Creatures |
Name | Hit Points | Speed | Attack | Defense | Damage | Shots | Cost | Special | Pop | Home |
|---|---|---|---|---|---|---|---|---|---|---|---|
    |
Goblin |
3 |
Medium |
3 |
1 | 1-2 | N/A | 40 |
N/A |
10 |
  Hut Hut |
    |
Orc | 10 | Slow | 3 |
4 |
2-3 | 8 |
140 |
N/A | 8 |
  Stick Hut Stick Hut |
    |
Wolf | 20 |
Fast |
6 |
2 |
3-5 | N/A | 200 |
2x Attacks |
5 |
  Den Den |
    |
Ogre | 40 |
Slow |
9 |
5 |
4-6 | N/A | 300 |
N/A | 4 |
  Adobe Adobe |
    |
Troll | 40 |
Medium |
10 | 5 |
5-7 | 8 |
600 |
Regeneration |
3 |
  Bridge Bridge |
    |
Cyclops | 80 |
Medium |
12 |
9 |
12-24 |
N/A | 750 +
Crystal |
2 space
beam, 20% chance
paralyze |
2 |
  Pyramid Pyramid |
Barbarians are all about attacking, hitting fast and hitting
hard. They have twice the amount of shooters as the knight and one of
which is the best ranged unit in the game (the troll). Most Barbarian
units are very lacking in the defense department, but having a knight
hero lead them can compensate for it. Barbarian creatures tend to gear
towards medium to slow speeds, with an overall slower makeup than the
knight's units. The Ogres and Orcs really can bog a barbarian down over
normal terrain, but a barbarian hero can make up for it with his lack
of a movement penalty over rough terrain. Snow and desert are a
barbarian's friend. If you can invest in a mage guild in your town,
pray for the spell haste so that way your hard hitting creatures can
get to your opponent quicker. Generally with every opportunity, you
want to ALWAYS if possible, hit you oppenent before they can do the
same to you. Assuming you have a crystal mine, you most likely should
be able to purchase every creature you can from your starting town by
weeks end.
Lord Slayer has it fairly tough in the campaign
however, being the second "weakest" town and not being given as many
bonus towns as the knight throughout the campaigns.
Now for the individual unit commentary:
 Their level 1 creature
hits pretty hard but can't really take any
damage (but twice as much and peasants can, though they only cost 10g
more per to produce) but are very plentiful. Making them fairly good
for swarming. their medium speed won't slow down a fast barbarian hero
either.
So they are good for mobile forces. 3 attack is very high for a level 1
unit and if they can get the drop on an enemy, they can do some serious
damage, especially in high numbers. Their damage is kind of low though,
about 1 and a half times more powerful than the paesant. (But bless
makes them do double and curse makes them only do paesant level
damage.) Their numbers can also be supplemented from huts scattered
about the Adventure map
Their level 1 creature
hits pretty hard but can't really take any
damage (but twice as much and peasants can, though they only cost 10g
more per to produce) but are very plentiful. Making them fairly good
for swarming. their medium speed won't slow down a fast barbarian hero
either.
So they are good for mobile forces. 3 attack is very high for a level 1
unit and if they can get the drop on an enemy, they can do some serious
damage, especially in high numbers. Their damage is kind of low though,
about 1 and a half times more powerful than the paesant. (But bless
makes them do double and curse makes them only do paesant level
damage.) Their numbers can also be supplemented from huts scattered
about the Adventure map


 Orcs
are very slow end cumbersome units, they have 2 less attack power than
their human (Archer) counterparts, but they have an added point of
defense, which keeps them alive a bit longer in early battles. .They
are also a tiny bit cheaper than their knight counterparts,
at
140G each and just as plentiful as well with 8 pop. Because of these
slow ranged units, the Barbarian tends to slow down in the middle and
late game when they have all their units. You may want to consider
leaving them behind if you want to keep your hero's overall mobility
high. However, if you field Ogres (another slow unit), there is no
reason to not also keep a supply of orcs handy due to their strengths
of being able to hit any unit on the map and the bonus of having
another ranged unit if your trolls are all tied up by enemy fliers.
They had counterparts who also enjoyed shooting arrows in King's Bounty.
Orcs
are very slow end cumbersome units, they have 2 less attack power than
their human (Archer) counterparts, but they have an added point of
defense, which keeps them alive a bit longer in early battles. .They
are also a tiny bit cheaper than their knight counterparts,
at
140G each and just as plentiful as well with 8 pop. Because of these
slow ranged units, the Barbarian tends to slow down in the middle and
late game when they have all their units. You may want to consider
leaving them behind if you want to keep your hero's overall mobility
high. However, if you field Ogres (another slow unit), there is no
reason to not also keep a supply of orcs handy due to their strengths
of being able to hit any unit on the map and the bonus of having
another ranged unit if your trolls are all tied up by enemy fliers.
They had counterparts who also enjoyed shooting arrows in King's Bounty.

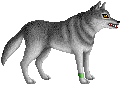
 Wolves
are a fast assault troop, extremely powerful for their level on the
offensive. Especially taking their 2 attacks into account. They have
extremely weak defense and cannot take hits too well, even with their
20 hp (5 more than the defense oriented pikeman, who will take much
less damage than the wolf). Wolves can be useful for many things, but
they tend to be best for attacking units that already have their
counter attack used up (which is unlikely as they are the barbarian's
only fast unit) or units that will not have the opportunity to counter
attack (paralyzed units). They are plentiful and cheap and hit very
hard, just try not to let them get hit much. Wolves were the default
unit for the Barbarian in King's Bounty.
Wolves
are a fast assault troop, extremely powerful for their level on the
offensive. Especially taking their 2 attacks into account. They have
extremely weak defense and cannot take hits too well, even with their
20 hp (5 more than the defense oriented pikeman, who will take much
less damage than the wolf). Wolves can be useful for many things, but
they tend to be best for attacking units that already have their
counter attack used up (which is unlikely as they are the barbarian's
only fast unit) or units that will not have the opportunity to counter
attack (paralyzed units). They are plentiful and cheap and hit very
hard, just try not to let them get hit much. Wolves were the default
unit for the Barbarian in King's Bounty.

 Ogres
are slow and lumbering. They are the opposite of the typical mobile
Barbarian and can put a real hamper on your strike forces. That is not
to say that they are bad. On the contrary, Ogres are the strongest
level 4 units in the game (Tied with minotaurs, who have a bit more
defense, damage and speed but less HP and have lower pop and cost more.
Also despite the vanilla nature of them, no
abilities). They just also happen to be the slowest. They are very
hearty, though they have little in the way of speed and defense, they
have huge HP, attack and damage values for their level and will be able
to seriously hurt even level 5 creatures. If you have a haste spell
handy, Ogres become effective attackers, able to wreak havok upon your
foes. If not, they still are very functional as defenders. Particularly
for guarding your vulnerable troops like Orcs and Trolls. If you need
to fill out your ranks and want to include 5 troop types, consider
Ogres and Orcs as a team instead of goblins. If you plan on being
mobile however, you may wish to use the goblins instead with another
town's quicker troops to back them up. (However, Ogres are a real
powerhouse, so often it's recommended to keep them if possible.) They
are quite affordable at 300 gold each. Ogres also enjoyed veteranship
from King's Bounty.
Ogres
are slow and lumbering. They are the opposite of the typical mobile
Barbarian and can put a real hamper on your strike forces. That is not
to say that they are bad. On the contrary, Ogres are the strongest
level 4 units in the game (Tied with minotaurs, who have a bit more
defense, damage and speed but less HP and have lower pop and cost more.
Also despite the vanilla nature of them, no
abilities). They just also happen to be the slowest. They are very
hearty, though they have little in the way of speed and defense, they
have huge HP, attack and damage values for their level and will be able
to seriously hurt even level 5 creatures. If you have a haste spell
handy, Ogres become effective attackers, able to wreak havok upon your
foes. If not, they still are very functional as defenders. Particularly
for guarding your vulnerable troops like Orcs and Trolls. If you need
to fill out your ranks and want to include 5 troop types, consider
Ogres and Orcs as a team instead of goblins. If you plan on being
mobile however, you may wish to use the goblins instead with another
town's quicker troops to back them up. (However, Ogres are a real
powerhouse, so often it's recommended to keep them if possible.) They
are quite affordable at 300 gold each. Ogres also enjoyed veteranship
from King's Bounty.

 Trolls
are the strongest of all of the ranged units in the game. They do a
fair bit of damage, can take a decent beating and have high attack
power (I sense a theme). They also regenerate any damage left of the
top surviving troll at the start of their turn, making their
survivability go way up against weaker opponents. They are key to your
success as a barbarian, so having your Ogres next to them is usually a
very good idea in combat, especially against flyers. Trolls were up
close brawlers in King's Bounty, however they seem to also be based off
of the rock throwing Giants of that game.
Trolls
are the strongest of all of the ranged units in the game. They do a
fair bit of damage, can take a decent beating and have high attack
power (I sense a theme). They also regenerate any damage left of the
top surviving troll at the start of their turn, making their
survivability go way up against weaker opponents. They are key to your
success as a barbarian, so having your Ogres next to them is usually a
very good idea in combat, especially against flyers. Trolls were up
close brawlers in King's Bounty, however they seem to also be based off
of the rock throwing Giants of that game.


 Cyclopes
are fairly strong creatures. They are tied for the third weakest spot
with Paladins when it comes to level 6 creatures. They do however have
a few things that set them ahead. First, their attacks are able to go
through one creature and hit the one standing on the hex immediately
behind it as well. This lets you take advantage of massed
groups
of foes and decimate crowds. Beware though, your opponent can take
advantage of it too and use your Cyclops' counter-attack to hit your
own troops. Another ability Cyclopes have is the ability to stun
opponents that are hit by their attacks. At 20%, there is even a slim
chance you could paralyze 2 of your opponents' troops at once, freeing
up your army to attack their other forces. They are also a fairly
affordable level 6 troop, and very populous.
Cyclopes
are fairly strong creatures. They are tied for the third weakest spot
with Paladins when it comes to level 6 creatures. They do however have
a few things that set them ahead. First, their attacks are able to go
through one creature and hit the one standing on the hex immediately
behind it as well. This lets you take advantage of massed
groups
of foes and decimate crowds. Beware though, your opponent can take
advantage of it too and use your Cyclops' counter-attack to hit your
own troops. Another ability Cyclopes have is the ability to stun
opponents that are hit by their attacks. At 20%, there is even a slim
chance you could paralyze 2 of your opponents' troops at once, freeing
up your army to attack their other forces. They are also a fairly
affordable level 6 troop, and very populous.
Barbarian Heroes
Barbarians are "Might" type
heroes.
They have an
large emphasis on attack and also slightly on defense.
Barbarians are natural
pathfinders. They have the
ability to not suffer and penalties from walking over rough terrain.
This can enable them to perform guerilla tactics against larger forces
more easily.
Described here are the Barbarians, in near-alphabetical order. You can
click on a character to see how they fare/progress as the Heroes series
does as well.
 Antoine
 |
Antoine
is a
very Generic Barbarian. Little is known about him as he only appears in this game. He looks like Meatloaf as a toothless hobo. |
 Atlas  |
Atlas
is
a very Generic Barbarian. Little is known about him as he only appears in this game and Heroes 2 with slightly different art. He is based off earlier Might and Magic Character art. |
 Crag Hack
 |
Crag Hack is the man. He is the only character other than Sandro to survive his way through every version of Heroes of Might and Magic in some form. He is based off earlier Might and Magic Character art. |
 Ergon
 |
Ergon,
not Egon...
He is fugly and young here, but he grows up and gets a
chiseled
jaw and keeps his love of wolf hats in the sequel. |
 Jojosh
 |
Jojosh
stays
exactly the same in heroes of Might and Magic 2 as he does in this
game, bald, barbaric and invented the red Snuggie. Nothing special
really. |
 Kelzen  |
Kelzen
goes
through a name change in Heroes 2 but other than that remains the same.
His helm, facial hair and love of standing in front of stone walls
remind me of Moradon from King's bounty... and makes me think they may
be one in the same. |
 Thundax
 |
Thundax
is the
ugly stick eating, brown toothed, "I'm not nude, I'm wearing a
headband" type twin brother of Lord Slayer. He doesn't improve his
looks in Heroes 2 either, but at least we don't have to look at him
anymore in further ganes. |
") Tsabu  |
If
"Change we can
all believe in" was a mace across our faces, Tsabu would be our man.
Fortunately it is not. He has all of the attack power of his barbarian
brothers, and he even does change for his next appearance (he gets a
real background)! |
 Yog  |
Yog is a half Genie Barbarian with a love of war. His history is discussed more in depth at the Heroic Evolution page. Needless to say, he's a fan favourite. | Lord Slayer |
Lord
Slayer is the
role the Human player takes if they play the single player campaign as
the Barbarians in any of the PC version. Bears a less ugly and
superficial resemblance to Thundax. He's not in the Gameboy Version. |

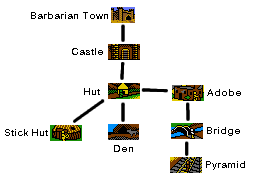
Barbarian Castle Building Statistics
The Barbarian has a few
small
challenges sent their way early in the game, but these are very minor
and require few resources to overcome. They do have a slight need for
crystal later on for sure though.


Castle
Every Town requires a castle to build anything else. This town is no
exception. Before it it built there is merely a tent in its stead.
Special:
Castles
allow your town to build additional buildings, hire heroes and also
provide 1000G/day.
Note: You NEED this.
Castles cost 5000 
 ,
20
,
20 
 and
20
and
20 


Well
The Well only requires a Castle and Hut to build.
Special:
Increases the creature population for each dwelling by 2 per week.
Note: You would be a fool NOT to buy it.
Wells
cost a
mere 500 .


Tavern
The Tavern requires only a Castle and Hut to be built.
Note: Not too useful except in defense, the Knight is meant for
striking early. Needed for Swordmen though so you have little choice in
the matter.
Special:
Increases the Morale of creatures defending the town by +2 (+20% chance
of moving again).
Taverns
are only
500 and 5 .


Thieves' Guild
The Thieves' Guild requires a Hut and Castle to be built.
Note: Not required for any other building. Special note! Not in the
Gameboy version (Image Fake)!
Special: Useful
for displaying information about the factions (increases as more are
added).
Thieves Guilds are pretty useful for the small cost of 750 and 5 .


Shipyard
The
Shipyard
requires a Hut and Castle to be built, and the castle to be
near water.
Note:
The
Shipyard allows you to construct Ships, allowing you to travel across
the sea to other lands.
Special:
Allows
creation of Ships for 1000
and
10 . (500 and 10
on Gameboy).
Shipyards
are
expensive suckers at 5000 and
20 .
Hut
The Hut is not only a dwelling, but it allows everything else
to be buildable.
Note: You prettymuch HAVE to take this.
Special:
Provides 10 Goblins per week at 50 each.
Huts are cheap. Only 300 .
Stick Hut
The Stick Hut requires a Hut.
Note: Not required to build stronger unit structures. Produces a weak, slow ranged unit.
Special: Provides 8 Orcs per week at 140
each.Stick Huts cost little at a mere 800
and 5  .
.Den
The Den requires a Hut.
Note: Not Required for any other structure.
Special: Produces 5 Wolves per week at 200
each.Dens cost 1000
.Adobe
The Adobe requires a Hut.
Note: Required to make the Bridge.
Special: Produces 4 Ogres per week at 300
each.Adobies cost 2000
,
10
and
10
.Bridge
The Bridge requires an Adobe.
Note: Makes the strongest ranged unit in the game, required for the Pyramid.
Special: Produces 3 Trolls per week for 600
each.The Bridge costs 4000
and 20
.Pyramid
Requires a Bridge.
Note: Creates the Highest level creature for the Barbarian castle.
Special: Produces 2 Cyclopes per week at 650
and 1 
 each.
each.The Pyramid costs 6000
, 20
and 20 ..
 The text in this document is licensed under the Creative Commons Attribution-NonCommercial-ShareAlike License. Anyone is free to use, copy, modify and re-distribute this work as long as they agree to the terms in the license.