
The Sorceress

Queen Lamanda


Each castle has a different crest depending upon the colour of the player. In this case
the yellow crest is that of Queen Lamanda, probably the only leader that keeps the toilet seat down.


Mystical Fairy Melody Land Awaits.
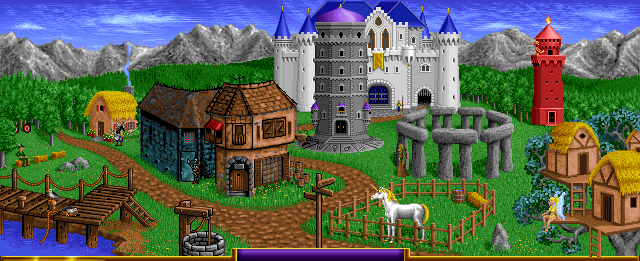
Sorceress Town Creatures
Here is a rundown of the Sorceress/Forest town and its base
creature
statistics. Learn them well.
| Barbarian Creatures |
Name | Hit Points | Speed | Attack | Defense | Damage | Shots | Cost | Special | Pop | Home |
|---|---|---|---|---|---|---|---|---|---|---|---|
| Sprite |
2 |
Medium |
4 |
2 | 1-2 | N/A | 50 |
Flying, No Retaliate |
8 |
  Treehouse Treehouse |
|
    |
Dwarf | 20 | Slow | 6 |
5 |
2-4 | N/A |
200 |
Magic Resistance | 6 |
  Cottage Cottage |
    |
Elf | 15 |
Med |
4 |
3 |
2-3 | 24 | 250 |
2x shots |
4 |
  Archery Range Archery Range |
    |
Druid | 25 |
Fast |
7 |
5 |
5-8 | 8 | 350 |
N/A | 3 |
  Stonehenge Stonehenge |
    |
Unicorn | 40 |
Medium |
10 | 9 |
7-14 | N/A |
500 |
Blinding |
2 |
  Fenced Meadow Fenced Meadow |
    |
Phoenix | 100 |
Fast |
12 |
10 |
20-40 |
N/A | 1500 + Mercury |
2 space flames, flying | 1 |
  Red Tower Red Tower |
The Sorceress has a very varied fighting force at her disposal.
She has 2 creatures of each type and only one creature without and
special abilities (but that one is a shooter!). Unlike most other
towns, the sorceress is only bogged down by a single slow unit that is
very easy to leave behind to garrison towns, Dwarves, who have the
single best stats of any level 2 creature and can be considered an even
match for pikemen, wolves, gargoyles... well... any melee unit at its
price point. The Sorceress hero emphasizes knowledge above all else, so
she should have a large repetiore of spells to complement her versatile
forces. Her weakest and strongest units are both flyers with
significant advantages, capable of knocking out enemy ranged attackers
quite effectively. While keeping those distracted, the 2 ranged
attackers in the sorceress army should be able to consistantly rain
death upon their foes, while the unicorns make a versatile attacker and
defender. What a sorceress doesn't have in raw strength is made up for
in flexibility when facing off with the Warlock's powerful flying
monstrousities.
Queen Lamanda is not the official victor of the campaign, but like the Warlock, she has the advantage of being able to use powerful creatures and spells to dominate the map if she's allowed to build up sufficiently. Just be to to always guard your ranged units!
Now for the individual unit commentary:
![]()
![]() The
sprite hits harder and has more manueverability than the Goblin, but
lacks a tiny bit of HP and is slightly less plentiful.4 attack is very
high for a level 1
unit and if they can get the drop on an enemy, they can do some serious
damage, especially in high numbers. Their damage is kind of low though,
about 1 and a half times more powerful than the paesant. (But bless
makes them do double and curse makes them only do paesant level
damage.) Sprites have a special ability to prevent enemies from being
able to counter-attack them. So hitting something with some sprites to
soften them up is a good idea, often using other units to mop up. They
can fly around and pester any unguarded ranged units, but they have
very little HP so be wary to try and avoid getting them in range of
other melee oriented units. They had a predecessor with similar powers
in King's Bounty and were the default unit of the sorceress.
The
sprite hits harder and has more manueverability than the Goblin, but
lacks a tiny bit of HP and is slightly less plentiful.4 attack is very
high for a level 1
unit and if they can get the drop on an enemy, they can do some serious
damage, especially in high numbers. Their damage is kind of low though,
about 1 and a half times more powerful than the paesant. (But bless
makes them do double and curse makes them only do paesant level
damage.) Sprites have a special ability to prevent enemies from being
able to counter-attack them. So hitting something with some sprites to
soften them up is a good idea, often using other units to mop up. They
can fly around and pester any unguarded ranged units, but they have
very little HP so be wary to try and avoid getting them in range of
other melee oriented units. They had a predecessor with similar powers
in King's Bounty and were the default unit of the sorceress.
![]()
 Dwarves
are the slow and plodding basic infantry of the sorceress. Extremely
useful in the early game and not too shabby later on, they are the
toughest level 2 creatures and stronger or just as strong as any other
creature costing the same amount (even level 3 creatures!). They have
20 HP, a huge amount for their level. They have the highest attack
(tied with wolves) and defense and also deal the most damage! (2-4 is a
lot for this level, extremely good when blessed... or bad when cursed.)
Later on in the game when the Sorceress army fills out, these guys make
a hearty garrison to your castle while your faster forces go out and
run circles around armies stuck with slower forces. That doesn't make
these guys useless though, positioning them near vulnerable ranged
units is key as the dwarves should have sufficient numbers to deal a
fairly reasonable amount to damage to whoever dares to draw close
though to them. Of course, they worked very similarly in King's Bounty.
Dwarves
are the slow and plodding basic infantry of the sorceress. Extremely
useful in the early game and not too shabby later on, they are the
toughest level 2 creatures and stronger or just as strong as any other
creature costing the same amount (even level 3 creatures!). They have
20 HP, a huge amount for their level. They have the highest attack
(tied with wolves) and defense and also deal the most damage! (2-4 is a
lot for this level, extremely good when blessed... or bad when cursed.)
Later on in the game when the Sorceress army fills out, these guys make
a hearty garrison to your castle while your faster forces go out and
run circles around armies stuck with slower forces. That doesn't make
these guys useless though, positioning them near vulnerable ranged
units is key as the dwarves should have sufficient numbers to deal a
fairly reasonable amount to damage to whoever dares to draw close
though to them. Of course, they worked very similarly in King's Bounty.

 Elves
are the opposite of dwarves, they are useless in a close ranged fight
and have very low skills for their level. They also have the lowest HP
of any level 3 unit (tied with the heartier pikemen at 15). They do
however make up for this in several ways. For one, they are not slow,
allowing them to take initiative at least before the slow level 2
shooters of the knight and barbarian castles. Also, they themselves are
shooters. While their damage from individual shots may not be
impressive (comparable to an orc and slightly less than an archer due
to less attack), they make up for it by shooting TWICE.
Yes, twice. That is why they get 24 shots, because even if they go
through them twice as quickly they still will be able to keep shooting
for more rounds than any other creature. They only cost 50 gold more
than dwarves and because they get the two shots, they can wreck packs
of slow creatures before they even get near to them. If you have Elves
and Druids together, there is no reason you can't attack stacks of
dwarves, paesants and ogres no matter the size. They just won't get to
you. Elves, as a fantasy staple were also in King's Bounty.
Elves
are the opposite of dwarves, they are useless in a close ranged fight
and have very low skills for their level. They also have the lowest HP
of any level 3 unit (tied with the heartier pikemen at 15). They do
however make up for this in several ways. For one, they are not slow,
allowing them to take initiative at least before the slow level 2
shooters of the knight and barbarian castles. Also, they themselves are
shooters. While their damage from individual shots may not be
impressive (comparable to an orc and slightly less than an archer due
to less attack), they make up for it by shooting TWICE.
Yes, twice. That is why they get 24 shots, because even if they go
through them twice as quickly they still will be able to keep shooting
for more rounds than any other creature. They only cost 50 gold more
than dwarves and because they get the two shots, they can wreck packs
of slow creatures before they even get near to them. If you have Elves
and Druids together, there is no reason you can't attack stacks of
dwarves, paesants and ogres no matter the size. They just won't get to
you. Elves, as a fantasy staple were also in King's Bounty.

 Druids
are a fast shooter unit. Able to start blasting before anything else
even has a chance to move if you position them right. They may not be
the strongest level 4 unit (their HP is tied for lowest with the
Swordsman) but their damage output should make up for that. There is
little else that is special about druids however. In combination with
the many flying creatures and the other shooter of the Sorceress' army,
Druids are a mighty addition to your force and it would be unwise not
to field them if you possibly can. They are the second most powerful
shooter in the game. Druids had a predecessor in King's Bounty.
Druids
are a fast shooter unit. Able to start blasting before anything else
even has a chance to move if you position them right. They may not be
the strongest level 4 unit (their HP is tied for lowest with the
Swordsman) but their damage output should make up for that. There is
little else that is special about druids however. In combination with
the many flying creatures and the other shooter of the Sorceress' army,
Druids are a mighty addition to your force and it would be unwise not
to field them if you possibly can. They are the second most powerful
shooter in the game. Druids had a predecessor in King's Bounty.

 Unicorns
are the cream of the Sorceress' vanguard forces (not just for their
white colouring either). They are a very strong melee unit that does a
lot of damage and is just as skilled as a Cavalry (and tied for most
skilled level 5 unit). With a Well, it would take you 2 days to buy all
of the unicorns produced by your town but it is definitely well worth
it. They have a 1 in 5 chance of blinding your enemy, causing that unit
not to be able to move until the effect wears off or it is attacked
(allowing you to concentrate your other co-ordinated attacks against
other foes). Unicorns are strong on the offensive, but are also great
for protecting your elves and druids from harmful flyers. Keep them
with you at all times if possible.
Unicorns
are the cream of the Sorceress' vanguard forces (not just for their
white colouring either). They are a very strong melee unit that does a
lot of damage and is just as skilled as a Cavalry (and tied for most
skilled level 5 unit). With a Well, it would take you 2 days to buy all
of the unicorns produced by your town but it is definitely well worth
it. They have a 1 in 5 chance of blinding your enemy, causing that unit
not to be able to move until the effect wears off or it is attacked
(allowing you to concentrate your other co-ordinated attacks against
other foes). Unicorns are strong on the offensive, but are also great
for protecting your elves and druids from harmful flyers. Keep them
with you at all times if possible.
 Phoenixes
are strong, fast flyers that often get the first move in combat. They
are the second strongest creatures in the game, but still no match for
dragons. You'll have to rely on your other troops and good tactics to
keep even footing should that match-up happen. Phoenix work very well
for getting groups of enemies that are packed close together, their
attacks are able to go
through one creature and hit the one standing on the hex immediately
behind it as well. This lets you take advantage of massed
groups
of foes and decimate crowds. Beware though, your opponent can take
advantage of it too and use your Phoenix's counter-attack to hit your
own troops. A Phoenix is extremely useful for tying up enemy ranged
units, but against less prepared enemies or weakened armies, they can
be one creature wrecking crews! Just be sure to watch out for them as
they still only have 100 HP each and 1500 gold and 1 mercury isn't a
cheap replacement cost!
Phoenixes
are strong, fast flyers that often get the first move in combat. They
are the second strongest creatures in the game, but still no match for
dragons. You'll have to rely on your other troops and good tactics to
keep even footing should that match-up happen. Phoenix work very well
for getting groups of enemies that are packed close together, their
attacks are able to go
through one creature and hit the one standing on the hex immediately
behind it as well. This lets you take advantage of massed
groups
of foes and decimate crowds. Beware though, your opponent can take
advantage of it too and use your Phoenix's counter-attack to hit your
own troops. A Phoenix is extremely useful for tying up enemy ranged
units, but against less prepared enemies or weakened armies, they can
be one creature wrecking crews! Just be sure to watch out for them as
they still only have 100 HP each and 1500 gold and 1 mercury isn't a
cheap replacement cost!
Sorceress Heroes
Sorceress' are Magic users.
They have an
large emphasis on knowledge and spellpower.
Sorceress' are natural sea(wo)men. They have the
ability to move twice as far as any other hero type over water.
This can enable them to perform guerilla tactics against larger forces
and surprise attacks from different angles on water maps.
Described here are the Sorceress Heroes, in near-alphabetical order.
You can
click on a character to see how they fare/progress as the Heroes series
does as well.
 Ariel
 |
She looks like Reed Richards in drag, but she serves for 2 games and had an npc picture in the Xeen games too. Not bad for a hero that shares a name with a certain mermaid... hm... is that why they are so good with boats? |  Astra  |
Astra
doesn't
change between the first 2 games and disappears subsequently. She had
the typical black and blue sorceress hair that a good third of them
have. She looks very angry. |
 Carlawn
 |
Another Sorceress with Sorci-blue hair. Appearantly a fan favourite among some people. She had an NPC in Xeen and in Heroes 2 she gets a new background (big whoop). |
 Gem
 |
Gem goes on
and
plays a role in Heroes 2, 3 and an expansion for 3. Then she disappears
somehow. She had a hideous NPC in Xeen but looked hot by Heroes 3:
Shadows of Death. |
 Luna
 |
Luna
completely
changed her look in Heroes 2, becomes a Hippie in Heroes 3:
Armageddon's Blade and finally as a weird twist of fate... a lunatic
vampire in Heroes 4. |
 Natasha  |
Natasha
really doesn't have her character explored much. She's mostly just
kinda... there. |
 Rebecca
 |
Other than
getting a new background in Heroes 2, Becky really isn't good for much
else her sister Sorceri can't do. |
 Troyan  |
Troyan get a
bit
more bling in her second outing. In this game she's just a Plain Jane
sorceress. No secondary skills here to build on. No story either...
shame really. |
 Vatawna  |
Either she's angry or she's scrunching up her face because her nose piecing is going to make her sneeze. Her face takes a softer look in the next game and she gets a background. And she's based on previous character art. | Queen Lamanda |
Queen
Lamanda is the
role the Human player takes if they play the single player campaign as
the Sorceress' in any of the PC version. She resembles the King's
Bounty Sorceress.. She's not in the Gameboy Version. |
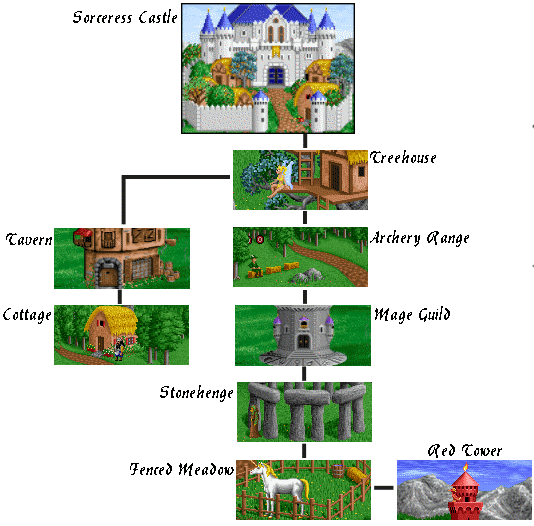
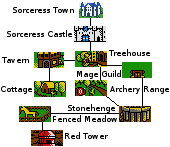
Sorceress Castle Building Statistics
The sorceress needs a
steady supply of Mercury as soon as possible on top of the usual wood
and (especially) ore. Secure them ASAP!


Castle
Every Town requires a castle to build anything else. This town is no
exception. Before it it built there is merely a tent in its stead.
Special:
Castles
allow your town to build additional buildings, hire heroes and also
provide 1000G/day.
Note: You NEED this.
Castles cost 5000 
 ,
20
,
20 
 and
20
and
20 


Well
The Well only requires a Castle and Treehouse to build.
Special:
Increases the creature population for each dwelling by 2 per week.
Note: You would be a fool NOT to buy it.
Wells
cost a
mere 500 .


Tavern
The Tavern requires only a Castle and Treehouse to be built.
Note: Not too useful except in defense, the Knight is meant for
striking early. Needed for Swordmen though so you have little choice in
the matter.
Special:
Increases the Morale of creatures defending the town by +2 (+20% chance
of moving again).
Taverns
are only
500 and 5 .


Thieves' Guild
The Thieves' Guild requires a Treehouse and Castle to be built.
Note: Not required for any other building. Special note! Not in the
Gameboy version (Image Fake)!
Special: Useful
for displaying information about the factions (increases as more are
added).
Thieves Guilds are pretty useful for the small cost of 750 and 5 .


Shipyard
The
Shipyard
requires a Treehouse and Castle to be built, and the castle to be
near water.
Note:
The
Shipyard allows you to construct Ships, allowing you to travel across
the sea to other lands.
Special:
Allows
creation of Ships for 1000
and
10 . (500 and 10
on Gameboy).
Shipyards
are
expensive suckers at 5000 and
20 .

Treehouse
The Treehouse is not only a dwelling, but it allows everything else
to be buildable.
Note: You prettymuch HAVE to take this.
Special:
Provides 8 Sprites per week at 50 each.
Treehouses are cheap. Only 500 and 5
Cottage
The Cottage requires a Tavern.
Note: Not required to build stronger unit structures. Produces a slow but very sturdy unit.
Special: Provides 6 Dwarves per week at 200
each.Cottages cost little at a mere 1000
and 5  .
.Archery Range
An Archery Range requires a Treehouse.
Note: Produces scrawny elves.
Special: Produces 4 Elves per week at 250
each.Archery Ranges cost 1500
.Stonehenge
A Stonehenge requires an Archery Range and Mage Guild.
Note: Required to make the Fenced Meadow.
Special: Produces 3 Druids per week at 350
each.Stonehenges cost 2500
,
10 
 and
10
.
and
10
.Fenced Meadow
The Fenced Meadow requires a Stonehenge.
Note: Required for the Red Tower.
Special: Produces 3 Trolls per week for 600
each.Fenced Meadows cost 3000
and 10 and 10 
 .
.Red Tower
Requires a Fenceed Meadow.
Note: Creates the Highest level creature for the Sorceress castle.
Special: Produces 1 Phoenix per week at 1500
and 1
each.Red Towers cost 10000
, 30
and 20  .
..
 The text in this document is licensed under the Creative Commons Attribution-NonCommercial-ShareAlike License. Anyone is free to use, copy, modify and re-distribute this work as long as they agree to the terms in the license.